

Building Curriculum
In the Curriculum Builder you author the teaching content that ships with your scenario: chapters, sections, tasks, questions, and the unlock keys that gate progression.
Opening the Curriculum Panel
Section titled “Opening the Curriculum Panel”Curriculum work always starts the same way: open the canvas, then click the Curriculum icon in the left rail to open the curriculum slide-out.
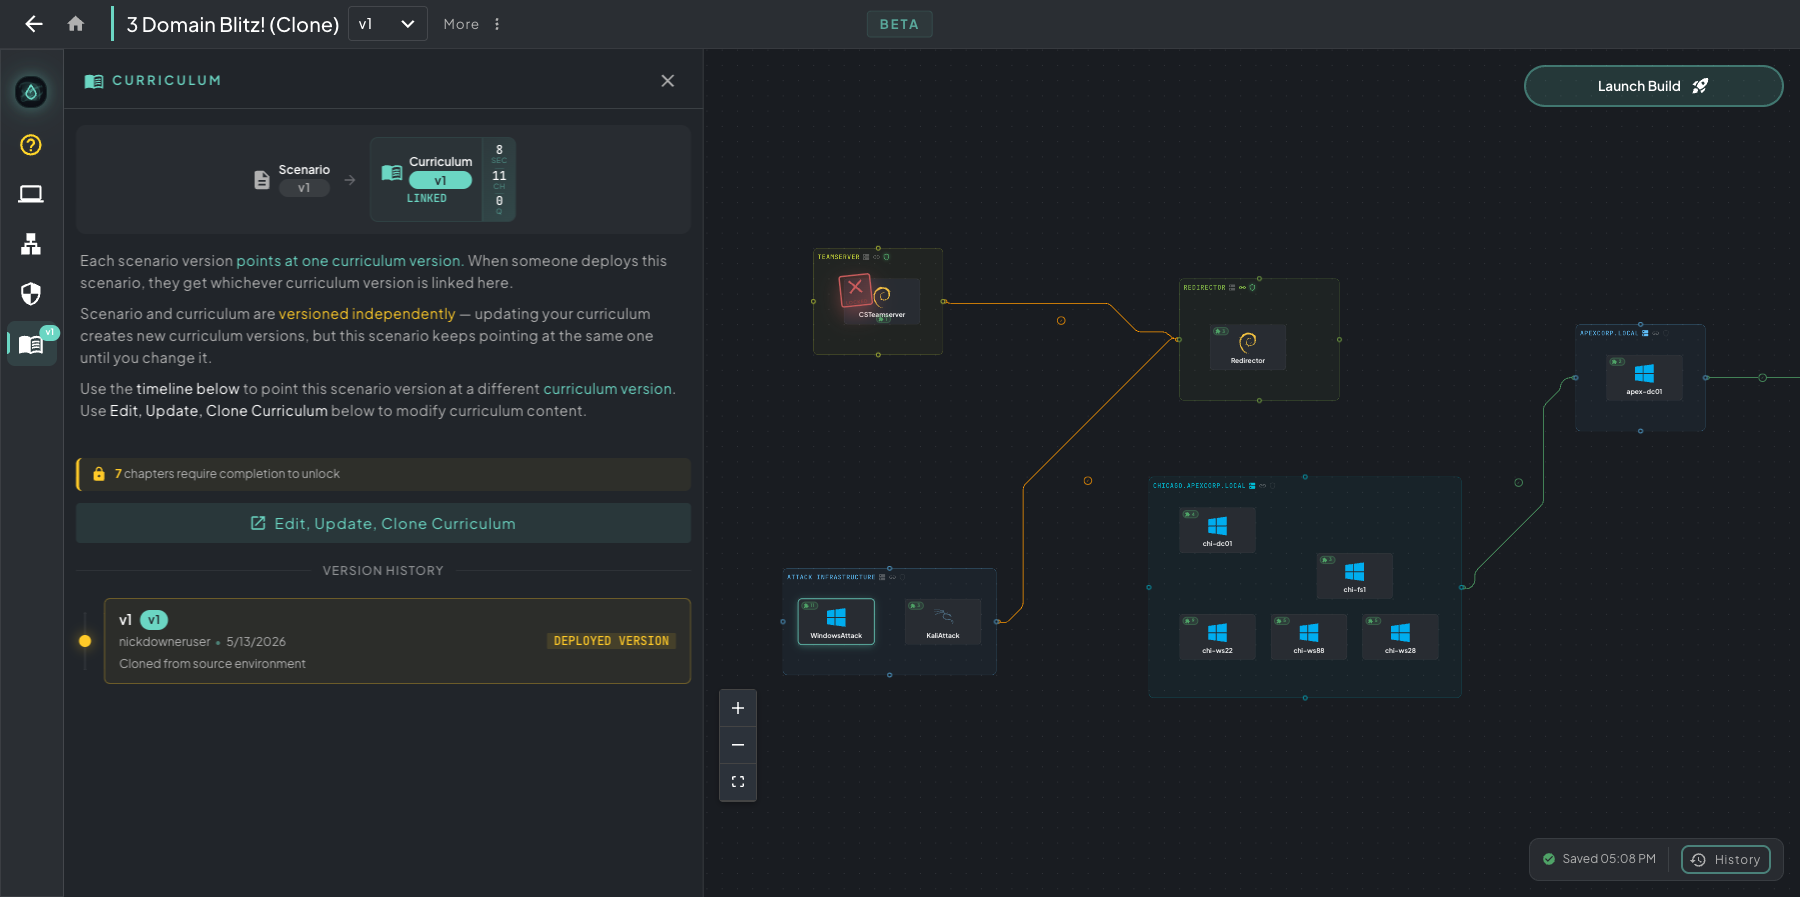 The curriculum slide-out. The current link is at the top, the Edit, Update, Clone controls are in the middle, and the full version history is below.
In this panel you choose which curriculum version ships with this canvas version. Canvas versions and curriculum versions are independent. You can keep working on draft curriculum while the canvas points at the previous version, so students stay on stable content, and then link the new version when it’s ready.
From here you can:
- See which curriculum version this canvas version is currently linked to
- Link the current canvas version to any curriculum version, including older ones
- Unlink so the canvas ships without curriculum
- Edit, Update, Clone the linked curriculum, which takes you into the Curriculum Builder
- Browse the full Version History to roll back if needed
Click Edit, Update, Clone Curriculum to open the Curriculum Builder and start authoring.
The Curriculum Builder
Section titled “The Curriculum Builder”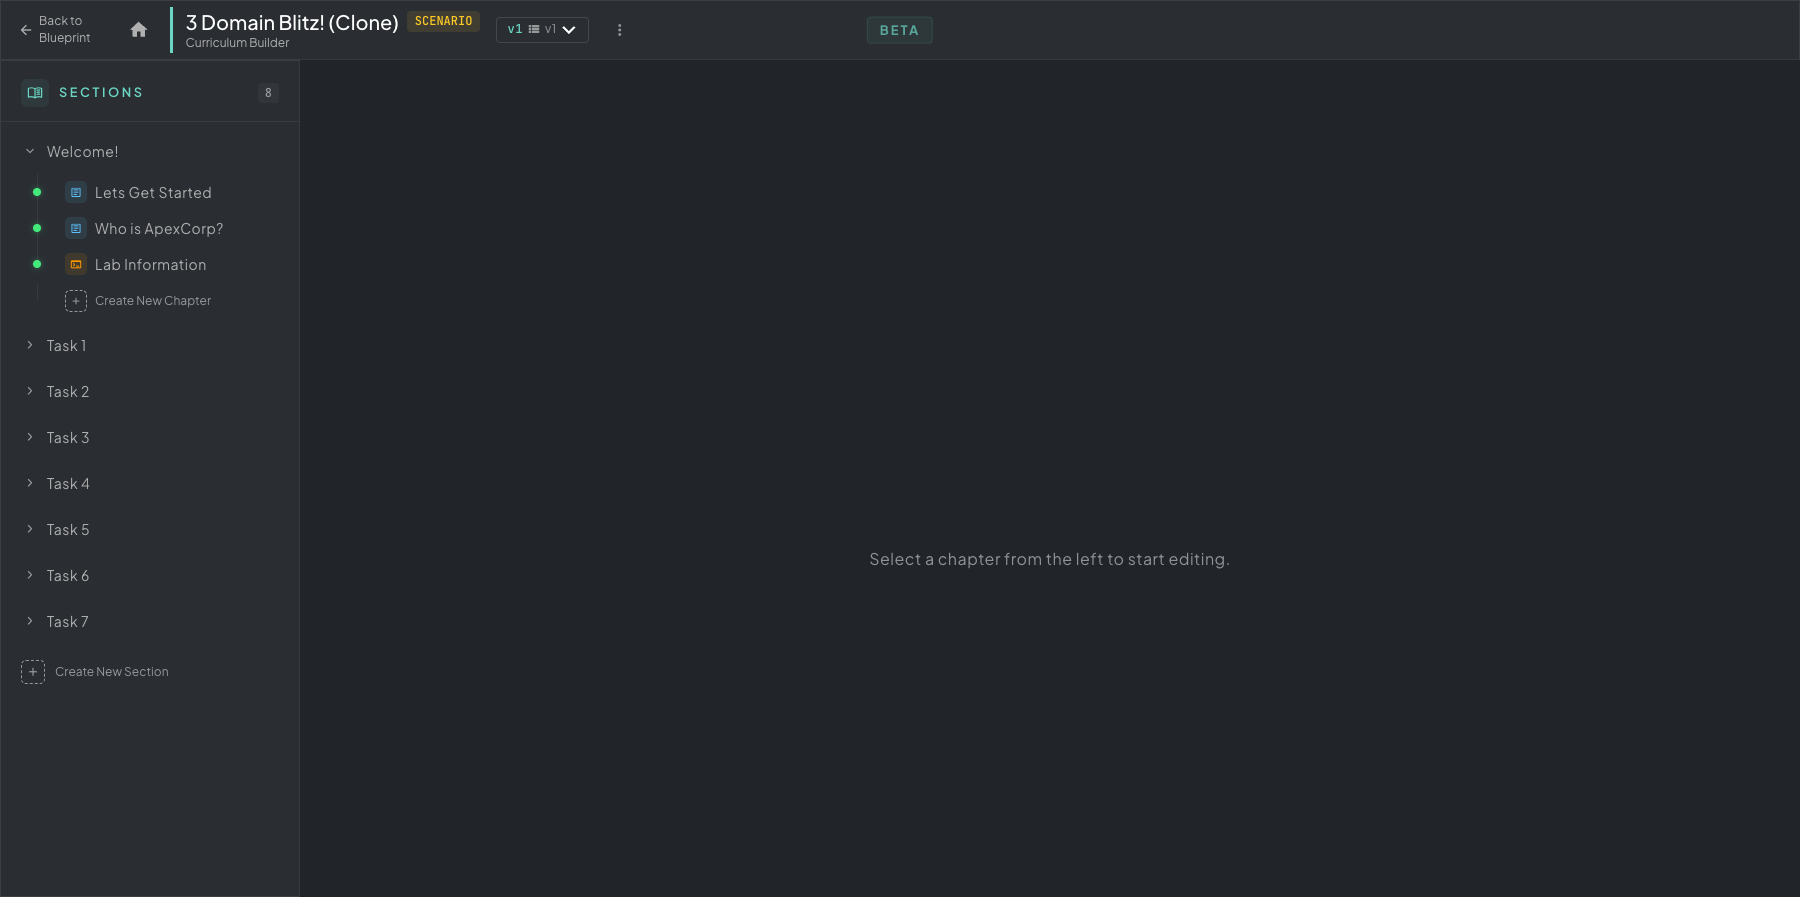 The Curriculum Builder, with Sections on the left and the content editor on the right. Each section can hold multiple chapters, and each chapter can hold any number of content blocks.
Curriculum is independent of the build cycle. You can author it before, during, or after a build, and updating it doesn’t require re-templatizing.
Sections and Chapters
Section titled “Sections and Chapters”The structure is two layers deep:
- Sections: top-level groupings such as Welcome, Task 1, and Task 2. Use + Create New Section at the bottom of the sidebar.
- Chapters: the unit students read and answer questions in. Chapters live inside a section. Use + Create New Chapter under any expanded section.
Drag to reorder. A green dot next to a chapter means it’s unlocked by default, with no flag gating. A padlock means an unlock key gates it.
In a CTF node-map curriculum, the chapter header also has Connect to Node and Move Chapter to New Parent, which open the Connect to Another Node and Move to Another Parent dialogs so you can link or re-parent a node without dragging.
Authoring a Chapter
Section titled “Authoring a Chapter”Click a chapter to open the block-based editor. The Available Blocks rail on the right lists every content type you can add.
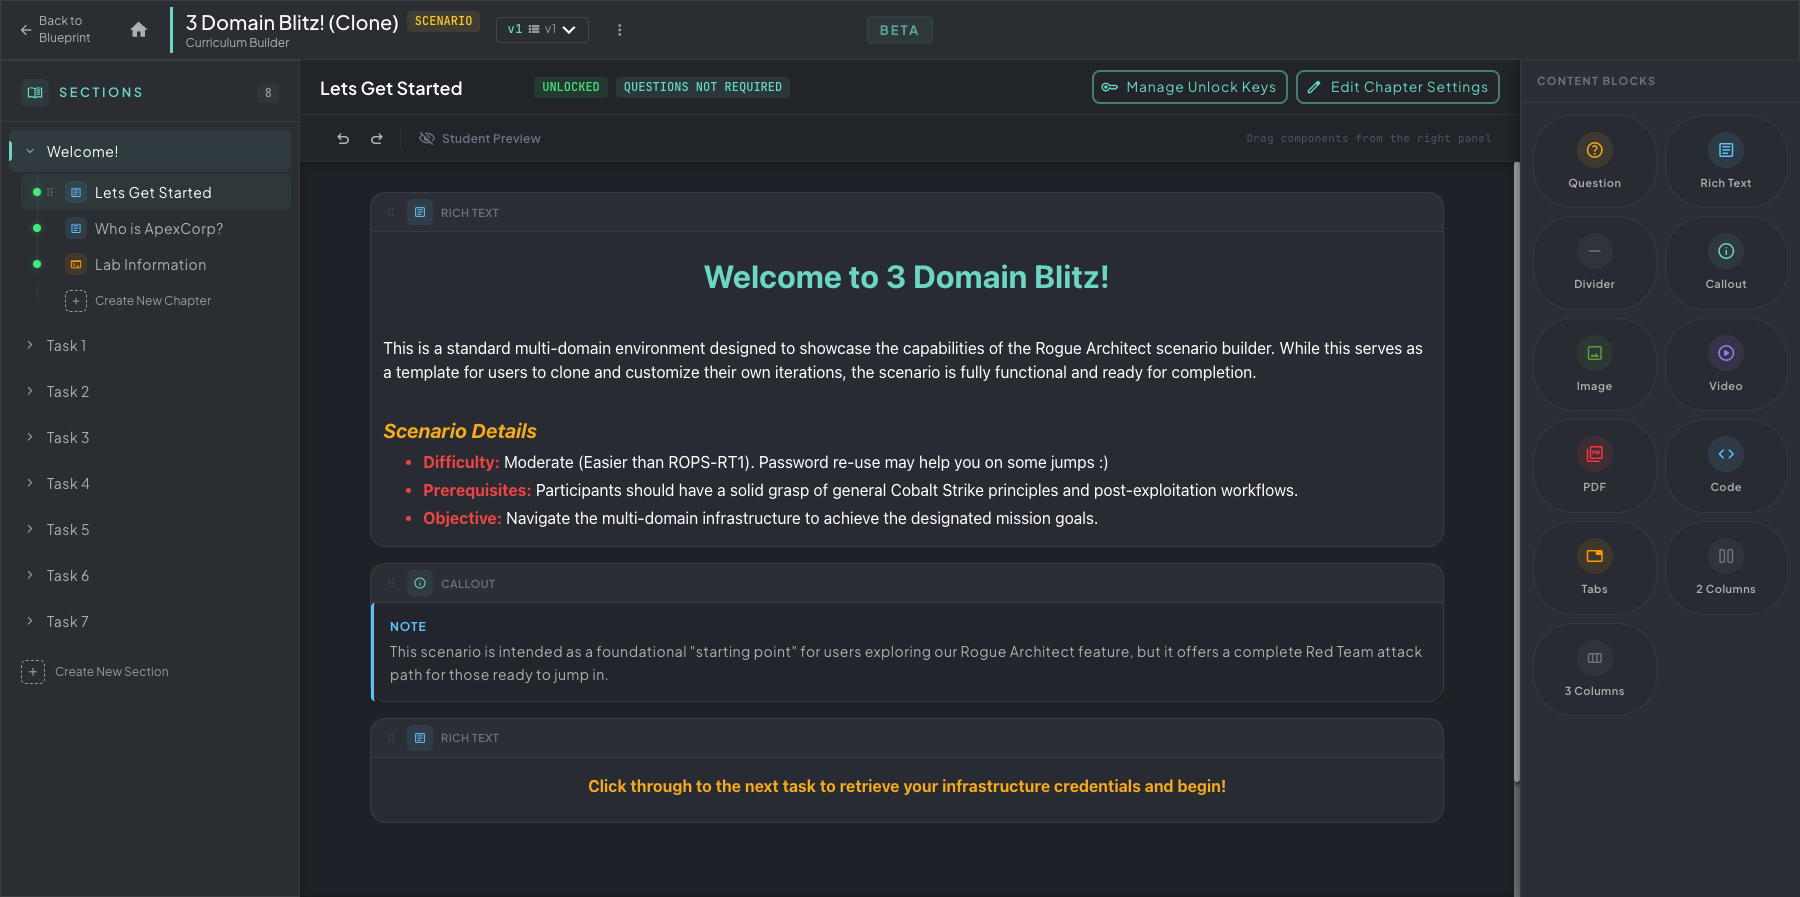 The chapter editor, with rich content on the left and the drag-and-drop block palette on the right.
Some of the block types you’ll use most:
- Rich text: formatted prose with headings, lists, bold and italic, inline code, and links
- Note / Tip / Caution: callouts for context, hints, and warnings
- Image: inline images such as screenshots, diagrams, and mission briefs
- Embed: videos and other external content
- Question: Short Answer, Long Answer, Multiple Choice, Multi-Select, Matching, Ordering, Diagram Selection, File Upload, Machine Action, or Branching Dialog
- Code block: fenced code with syntax highlighting for commands or scripts
Drag blocks from the palette into the chapter, then click a block to edit its content in place.
Unlock Keys
Section titled “Unlock Keys”To gate a chapter behind a flag that students must capture inside the lab, click Manage Unlock Keys in the chapter header. Click Add Key to open the six-step stepper.
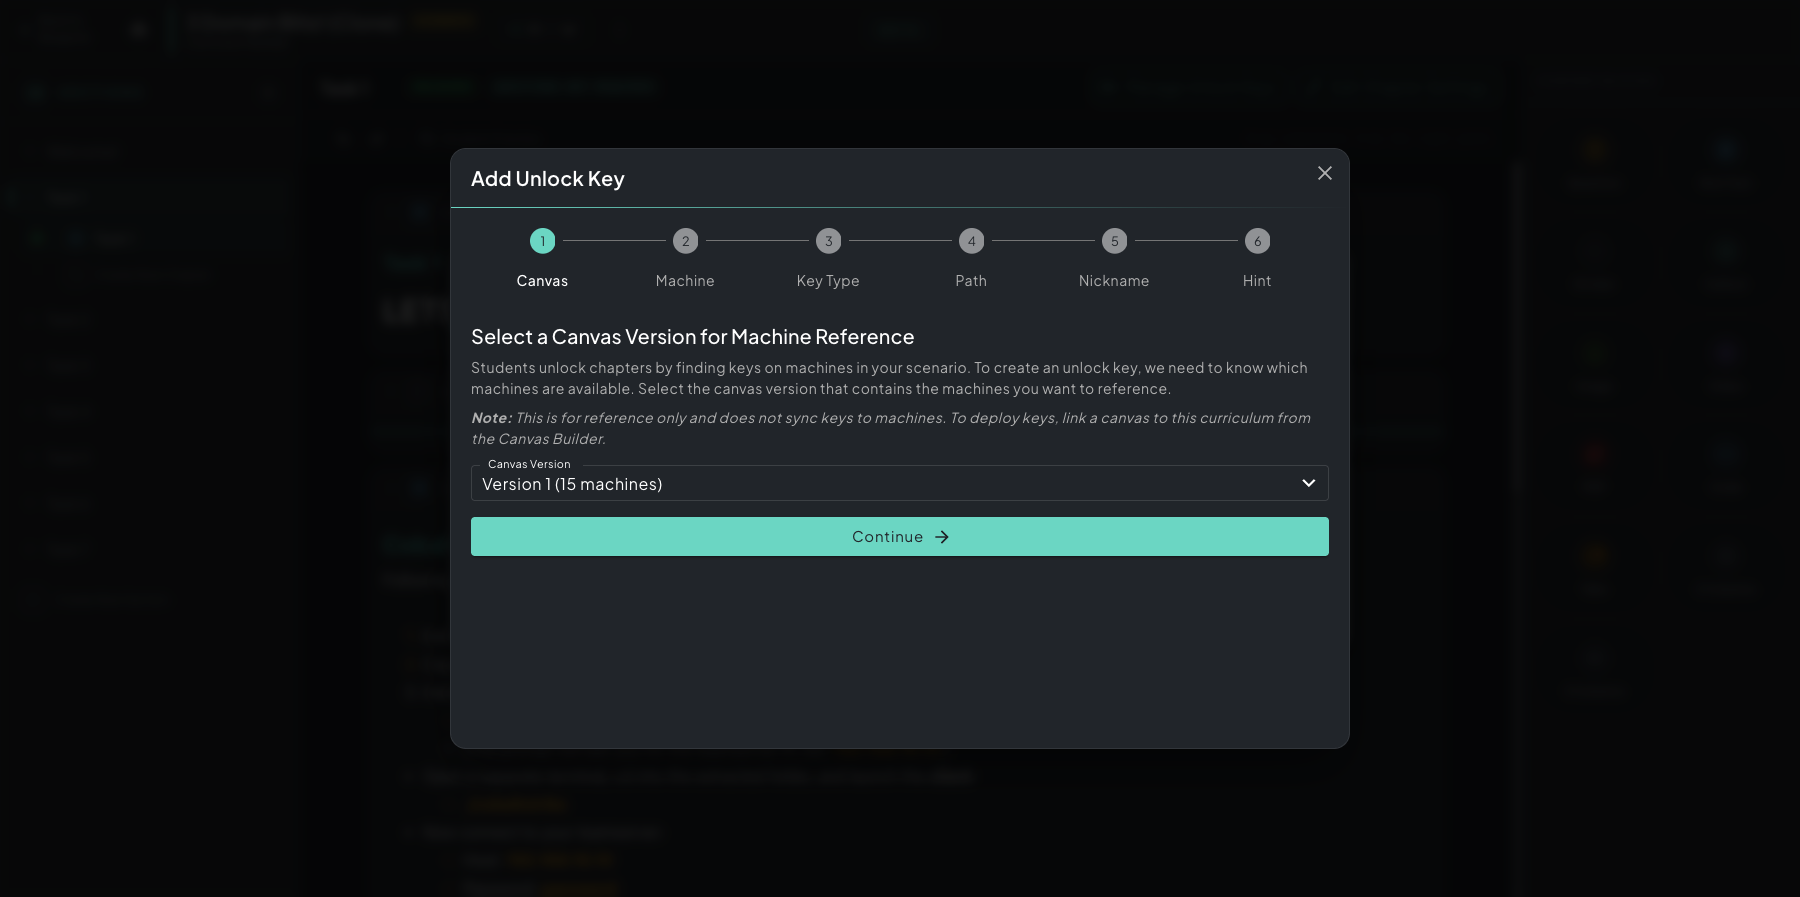 The Add Unlock Key stepper. Its six steps run from picking the machine that hosts the key to writing the hint students see.
The six steps:
- Canvas: pick the canvas version whose machine list you want to reference. This step is for reference only and doesn’t sync keys to machines. It fills the machine dropdown for the next step.
- Machine: pick the machine in that canvas where the key lives. Students will connect to this machine and search it for the flag.
- Key Type: Write to File (Rogue Arena writes a unique per-learner key to a path you choose) or Run Command + Regex (passes when a command’s output on the machine matches your regex, optionally with a value the student enters). The platform uses it to validate the submission.
- Path: the file path on the machine where the key is written, such as
C:\letsgo.txt. - Nickname: an internal name that helps you find this key later in the keys list.
- Hint: the message students see when they click the locked chapter. Point them to the machine and roughly where to look. The more cryptic the hint, the more hands-on the lab work.
For Run Command + Regex, the stepper has seven steps: Command and Regex replace Path.
When a student clicks a locked chapter, they see your hint, work through the lab to find the flag, and paste it in to unlock the chapter. Keys are salted per learner, so students can’t share flags. See Flag Unlocks for the student’s view.
Team Collaboration
Section titled “Team Collaboration”For team-based scenarios, you can turn on Team Collaboration. Chapter unlocks and question answers then apply to the whole deployment instead of to each user, so a team can split up the work. The student docs cover this under Curriculum progress.
Scoring and Progress
Section titled “Scoring and Progress”Version-wide settings, including Team Collaboration, live in the Edit Curriculum Version drawer. To open it, click the ⋮ menu in the Curriculum Builder header and choose Edit. Click Save when you’re done.
Student progress tracking
Section titled “Student progress tracking”Pick how a learner’s progress is counted:
- Mark as complete: learners mark each chapter complete. The course is done when every chapter is marked.
- All questions answered: done when every question is answered.
- Locked chapters: done when every locked chapter is unlocked.
With All questions answered, more options appear:
- Passing score (%): a whole number from 1 to 100. Leave it empty to track completion without a pass mark. It needs at least one automatically graded question; short answer, long answer, and file upload questions aren’t graded.
- Answer questions in order: learners answer in course order.
- Allow retries: a learner’s latest answer counts. With it off, the first answer is final.
- Hide results until the end: learners see their score only when they finish. This can’t be on together with Allow retries.
The Test and Lab buttons fill these in for you. Test sets in order, one try, hidden results, and a passing score (80% unless you already set one). Lab sets in order, retries allowed, and visible results. A tag shows which preset matches, or Custom.
The drawer warns you about settings that can’t work, such as a mode with no questions or no locked chapters to finish. With Team Collaboration and hidden results, the first answer from any teammate is final for the whole team. Progress tracking isn’t available on CTF curricula. See How Progress Is Tracked for what learners see.
Minimum passing score for a locked chapter
Section titled “Minimum passing score for a locked chapter”A locked chapter can require a score before it opens. Click Edit Chapter Settings in the chapter header, then:
- Turn on Locked by Default.
- Turn on Require questions before unlock. Learners must answer every question in the chapter before it unlocks.
- Optionally set Minimum passing score. The learner’s average score must meet it. Leave it empty and any submission unlocks the chapter.
- Click Save Changes.
Only questions answered in the unlock prompt count. Machine checks and branching dialogs are answered after the chapter unlocks. Minimum passing score is off when the version tracks All questions answered with Allow retries off, since a learner below the minimum could never answer again.
Points Economy
Section titled “Points Economy”Turn on Points Economy in the version drawer to award points when learners unlock locked chapters or CTF nodes. Points feed scoring such as the CTF leaderboard. Then, on each locked chapter:
- In Edit Chapter Settings, set Points awarded on unlock. Leave it empty for no award.
- Under Paid Hints, above the chapter content, add up to 4 hints. Enter the hint text and a Cost of at least 1 point, then click Add. Paid Hints appear once the chapter is saved as locked. Edit a hint and click its Save, use the arrows to reorder, or delete it. A readout compares the hints’ total cost with the chapter’s award and warns if the hints cost more.
Learners spend their points to reveal paid hints in the unlock prompt. See Paid Hints for their side.