

Phase 2: Build & Test
When you launch a build, Rogue Architect switches to active building mode. The canvas becomes a live monitoring dashboard. You can watch VMs come up and plugins run, and debug problems while the build is still going.
What You’ll See
Section titled “What You’ll See”Compact status bar
Section titled “Compact status bar”A compact status bar stays at the bottom of the canvas. It shows the overall status badge, plays completed out of total plays, tasks remaining, elapsed time, and the Redeploy Build and Remove Build actions.
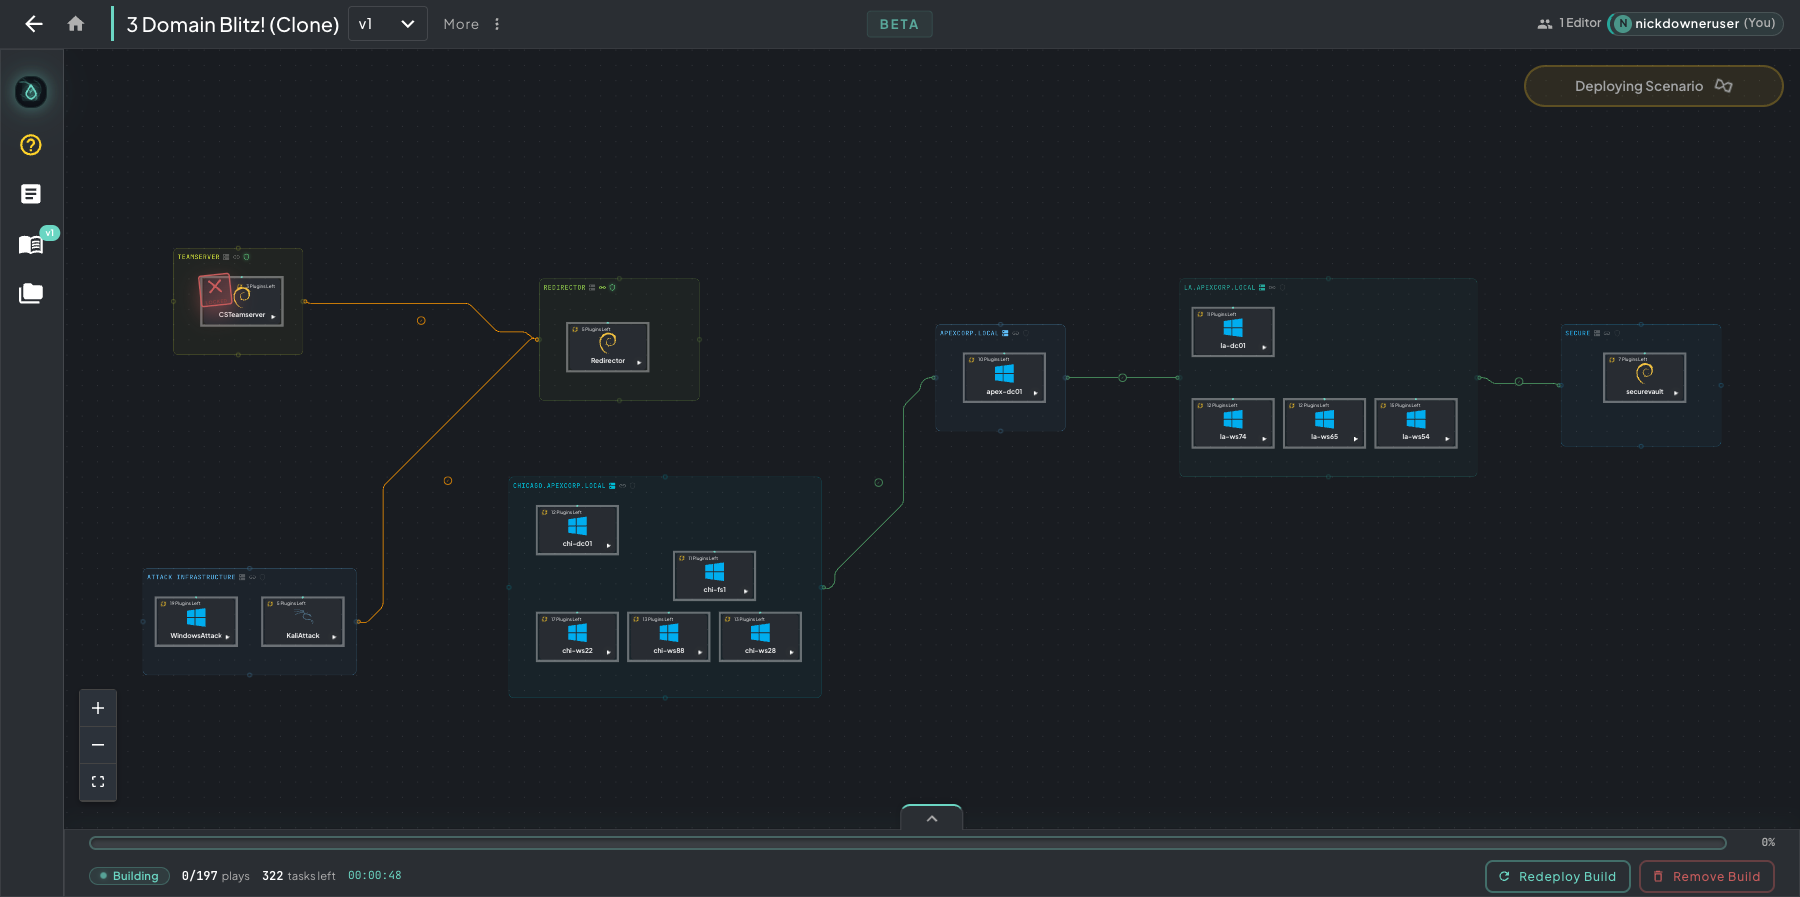 The compact status bar. Total plays and tasks left stay visible in the lower-left, so you can check progress without leaving the canvas.
Expanded dashboard
Section titled “Expanded dashboard”Click the caret in the middle of the bar to open the full monitoring dashboard. The 6-phase pipeline strip runs across the top (Clone Infra → Clone VMs → Start Infra → Start VMs → Build Steps → Complete). Below it, the current build status card on the left shows plays, tasks, and build options. The activity feed is in the middle, and the Default Machines and Build Infra tabs are on the right.
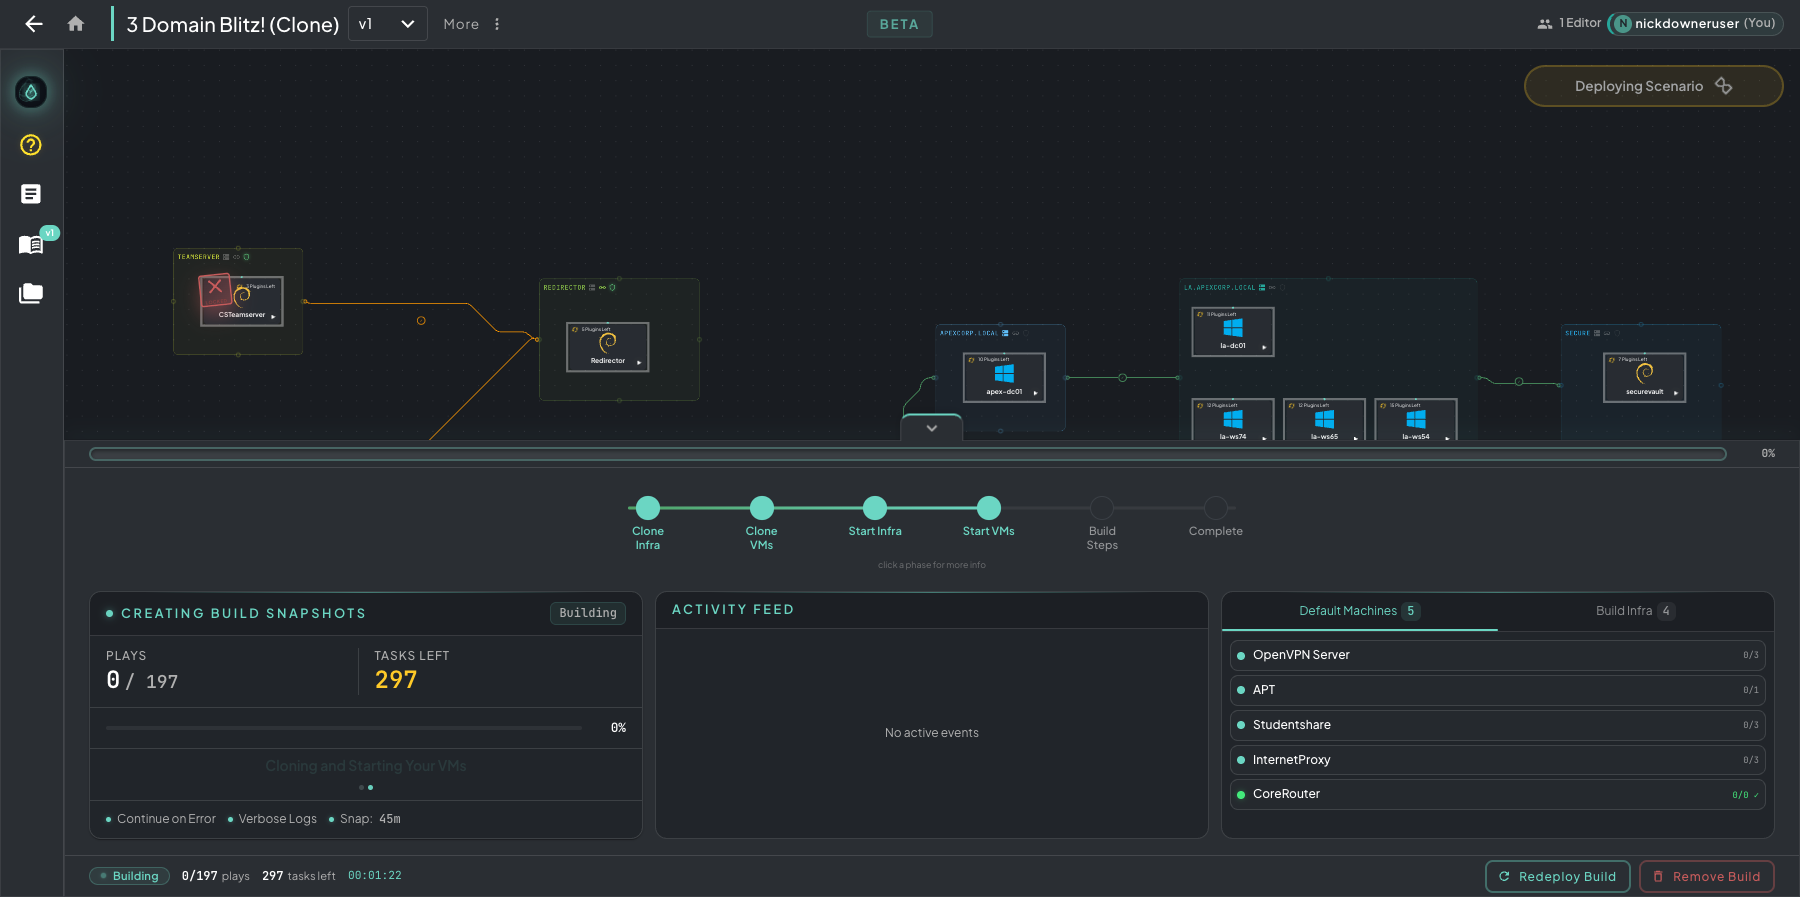 The expanded view puts the pipeline strip, the plays and tasks card, the activity feed, and the machine tabs in one panel.
Per-machine progress on the canvas
Section titled “Per-machine progress on the canvas”Each machine card shows a Plugins Left counter and gets a small green dot when the machine is online. The ▶ play button in the lower-right of each card opens a live VM viewer, where you can work inside the machine and watch plugins install as they run.
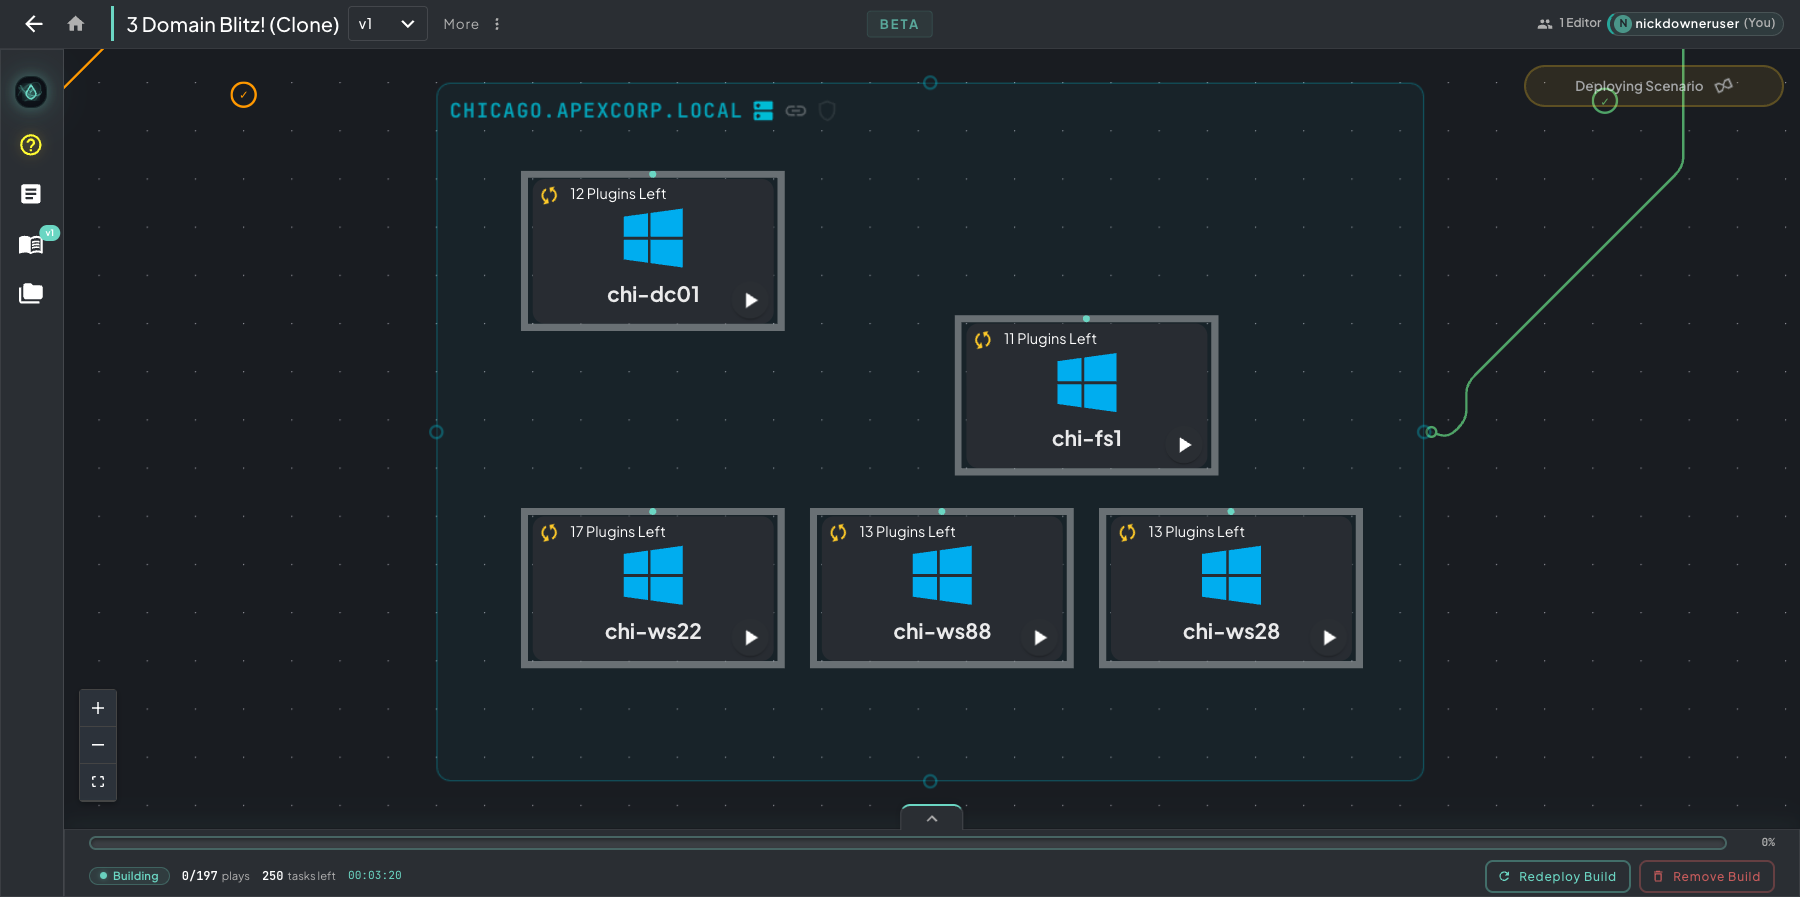 Each machine card shows its plugins remaining, a green online dot, and a play button that opens the VM viewer while the build runs.
Left rail
Section titled “Left rail”The left rail stays the same during a build: Help Me!, Machines, Networks, Firewall, Cloud, Port Mirroring, Curriculum, Evals, and Vaults. Vaults is disabled until a build is running. Rogue Oracle isn’t in the rail. Open it from the AI Building Activity card that floats over the top-left of the canvas.
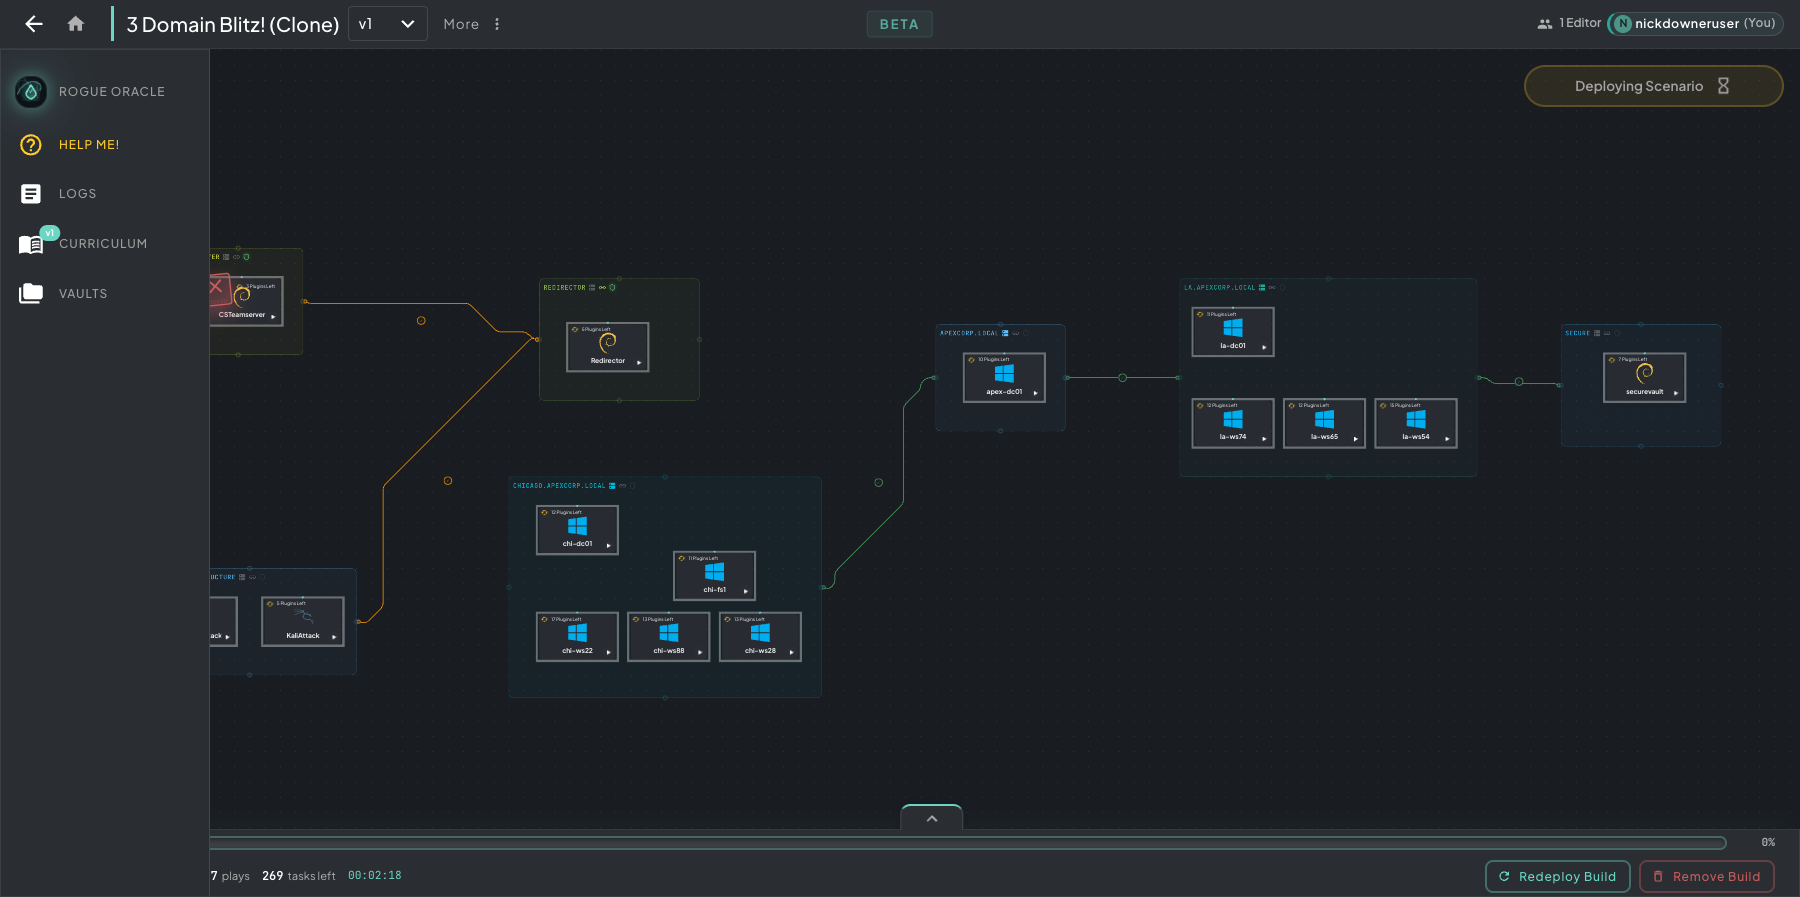 The left rail during a build. Help Me! is the place to start, and the design tools, Curriculum, and Vaults are one click away.
Logs, Errors, and Redeployment
Section titled “Logs, Errors, and Redeployment”If a build fails or hits an error while it runs, the sections below show how to read the error state on the canvas, find the cause in the logs and Ansible output, and recover by redeploying from a snapshot. You usually don’t have to rebuild from scratch.
When something errors
Section titled “When something errors”What happens depends on your Continue on Error setting. With it off, the build stops at the first failure. With it on, the build keeps going and flags each errored plugin, so you can find every issue in one run. Plays that depend on a failed play don’t run; the play list marks them Skipped and names the play they depend on.
When a build halts, the expanded dashboard shows a Build halted card with the reason: the failing play, or the infrastructure task and machine that failed.
1. Spot the errored host on the canvas. Machines that succeeded show Done! beside a green status light, with a full teal progress ring. A machine with a failed plugin turns red, and a badge in its corner shows how many plugins errored. The status pill in the top-right changes to Scenario Build Errored.
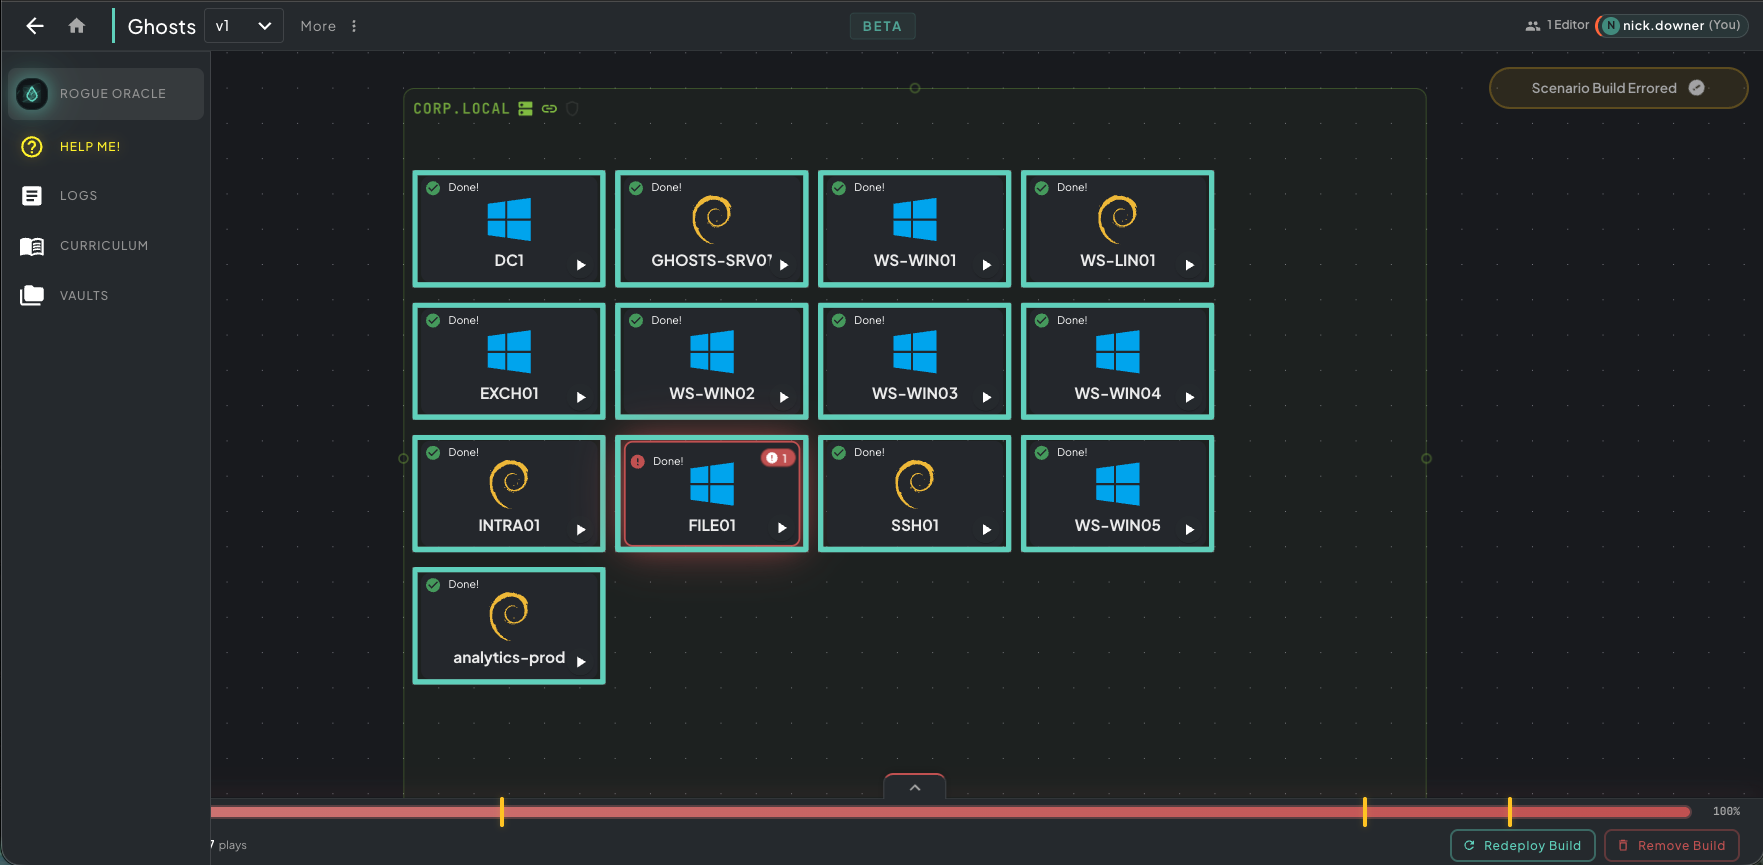 FILE01 turned red with a
1 badge in the corner, which means one plugin on that machine errored. Every other machine in the VLAN finished cleanly.
2. Single-click the host to open its play list. This opens the Build Progress panel on the right, which lists every play the machine ran. Successful plays are marked Installed in green. The failed play is marked errored in red and has a file icon that opens its log.
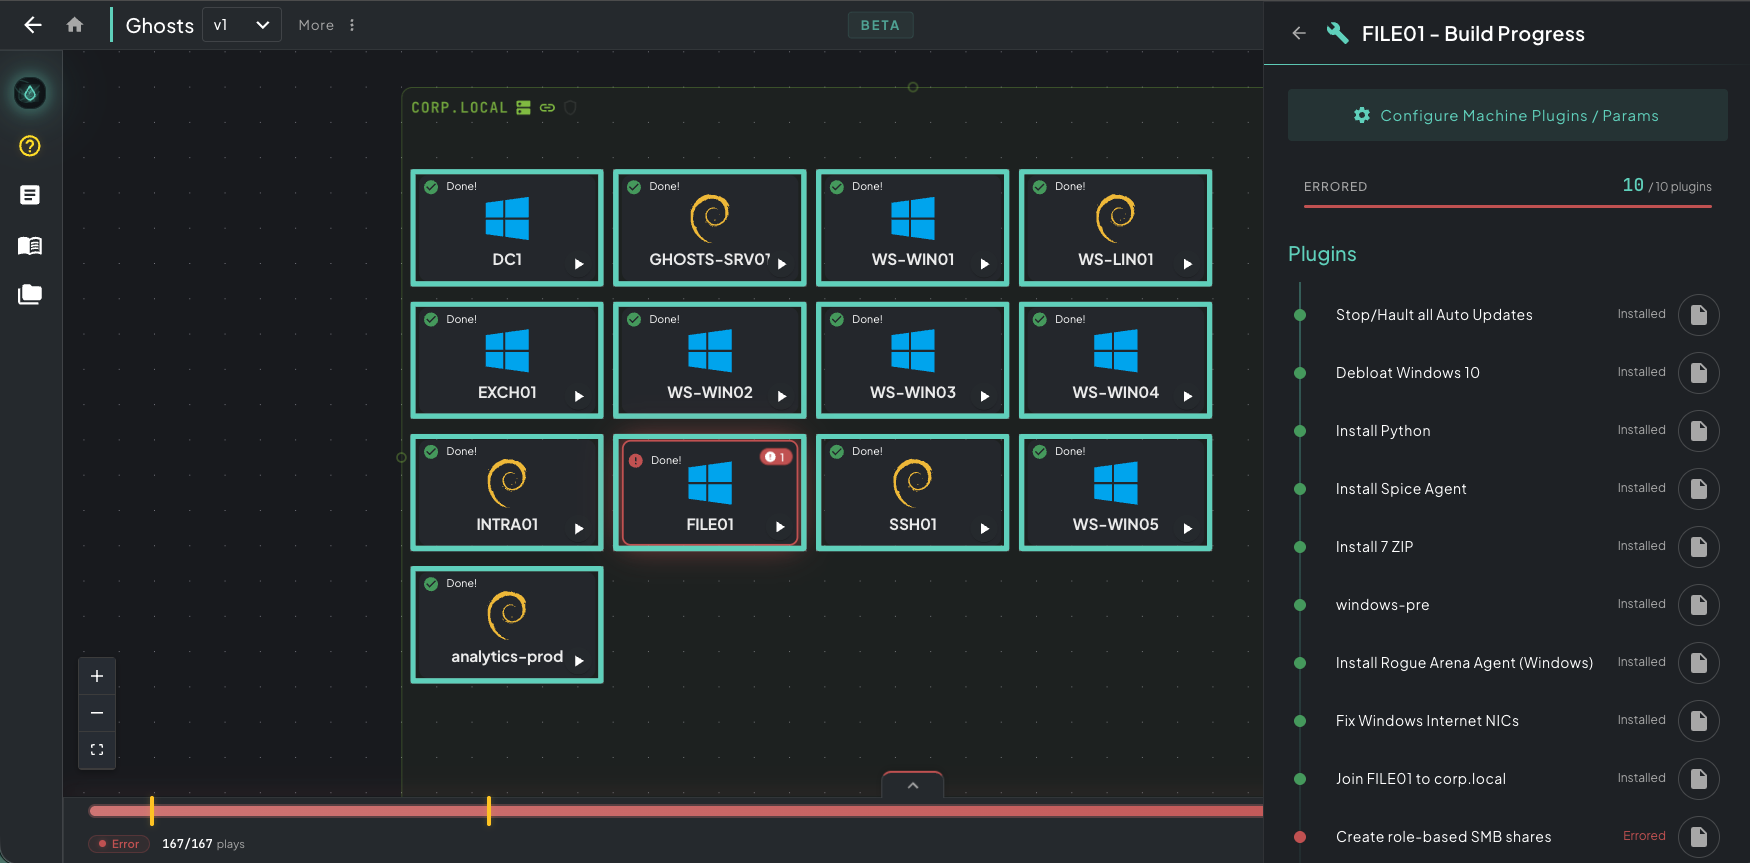 The Build Progress panel lists every play on FILE01 with its status. The errored “Create role-based SMB shares” play is flagged red at the bottom.
3. Click the file icon to open the Ansible log for the failed play. A full Monaco viewer opens with the entire Ansible run for that play, including PLAY/TASK headers, color-coded status markers, and highlighted FATAL lines.
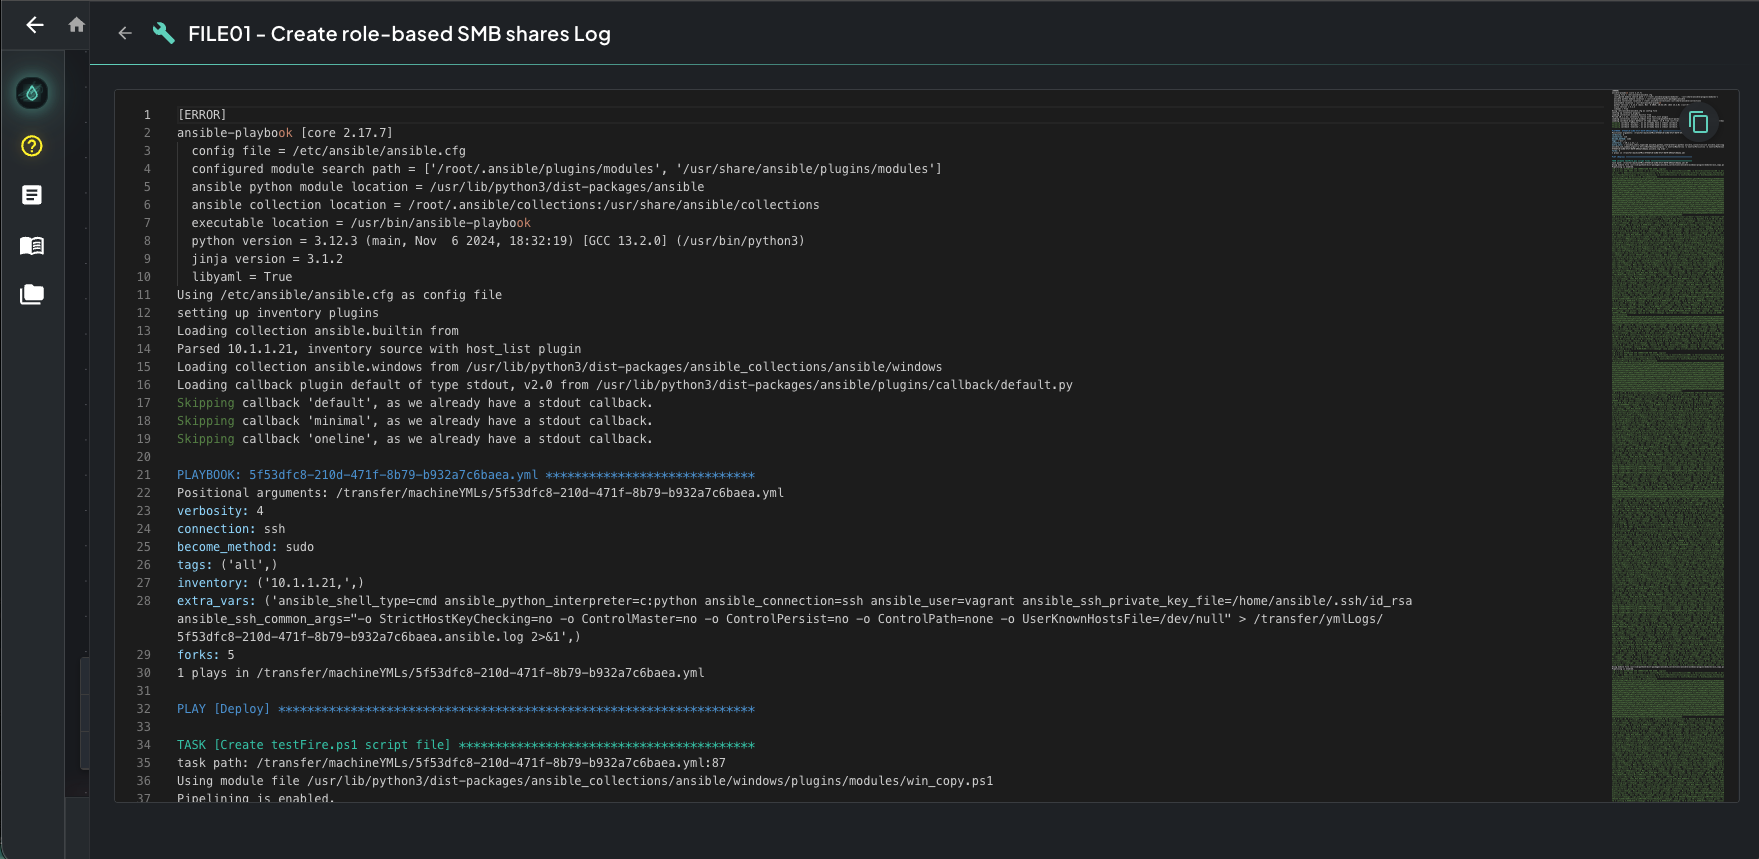 The top of the play log shows Ansible starting up, module discovery, and the first tasks. The error is rarely here, so keep scrolling.
4. Scroll to the bottom. Ansible stops the play at the first task that fails, so the line that explains why is almost always at the very bottom. Find the last fatal: [hostname]: FAILED! line. The message and module output under it are the real failure reason. The PLAY RECAP summary follows.
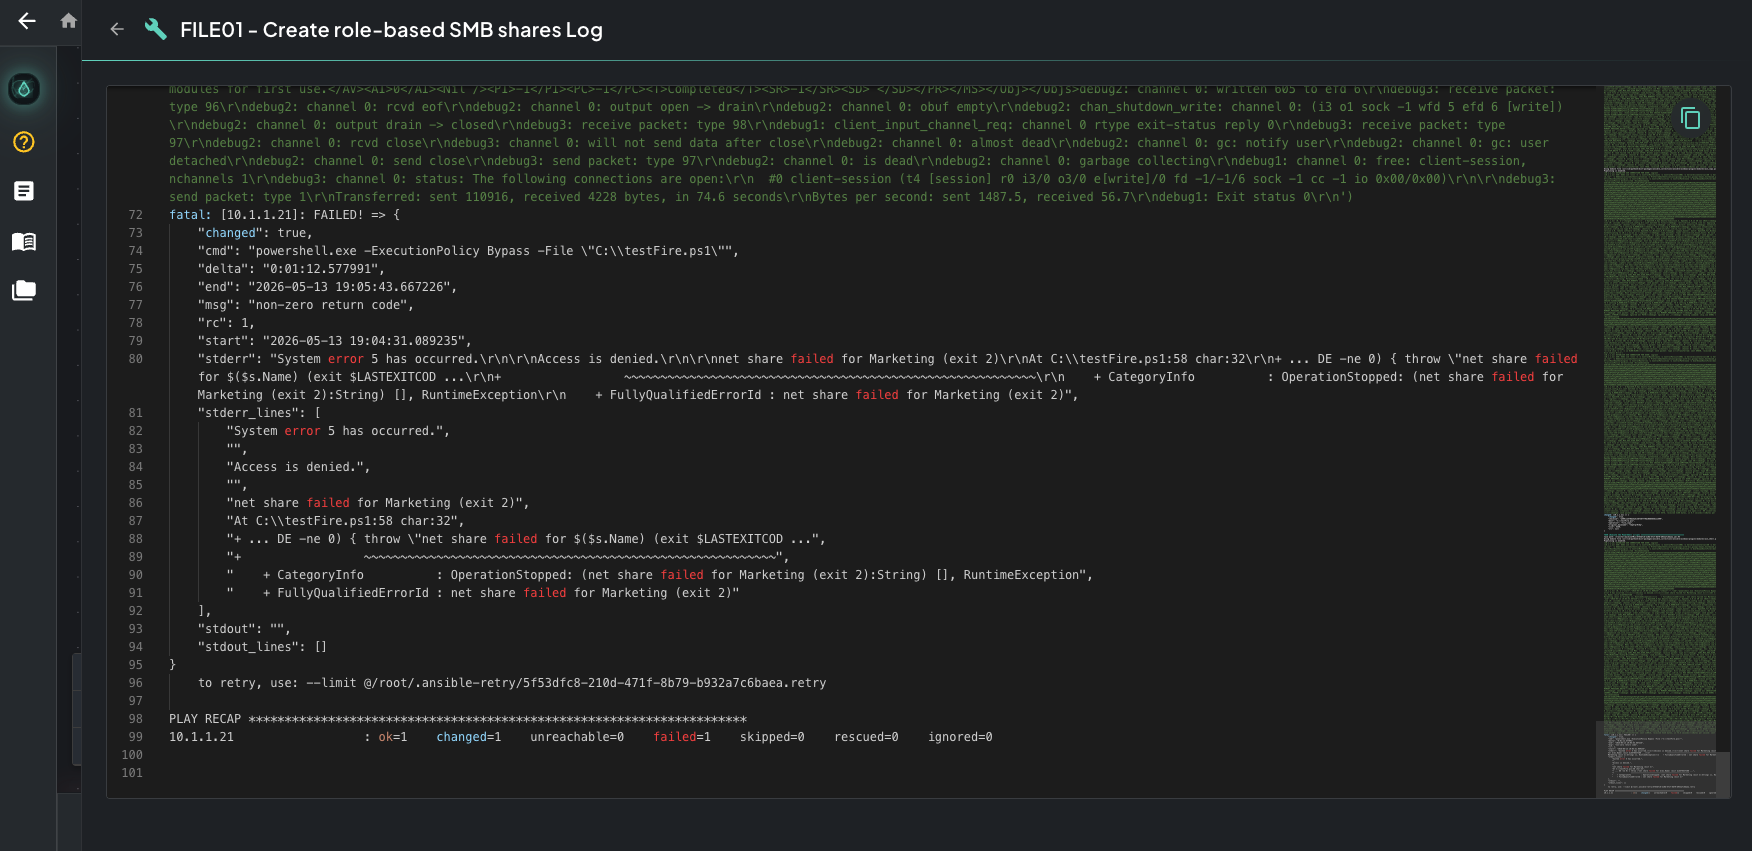 The bottom of the play log, with the last FATAL block and the PLAY RECAP. The failure reason is in that last FATAL block.
If the bottom of the log doesn’t tell you the cause, redeploy with Verbose Logging turned on. That gives you the full -vvvv Ansible output, with variable values, connection details, module arguments, and full tracebacks.
After diagnosing the issue
Section titled “After diagnosing the issue”Once you know why the build failed, you have two options. You can keep the deployment and recover from a checkpoint, or you can tear everything down and start over.
Redeploy Build
Shows a plan before it runs. Resume from checkpoint reverts the VMs to the checkpoint before your earliest change and continues with your fix applied. Best for plugin tweaks, parameter changes, or small canvas edits. Rebuild from scratch replaces the deployed VMs and networking, and is required when you change infrastructure or networking.
Remove Build
Tears down all infrastructure and returns the canvas to design mode. Use it to start fresh. Every VM and any unsnapshotted state is destroyed.
Verifying completion
Section titled “Verifying completion”When a build finishes cleanly, a Create Machine Templates button appears in the top right of the canvas. That button means every play on every machine ran with no errors. The build is 100% complete and ready to templatize.
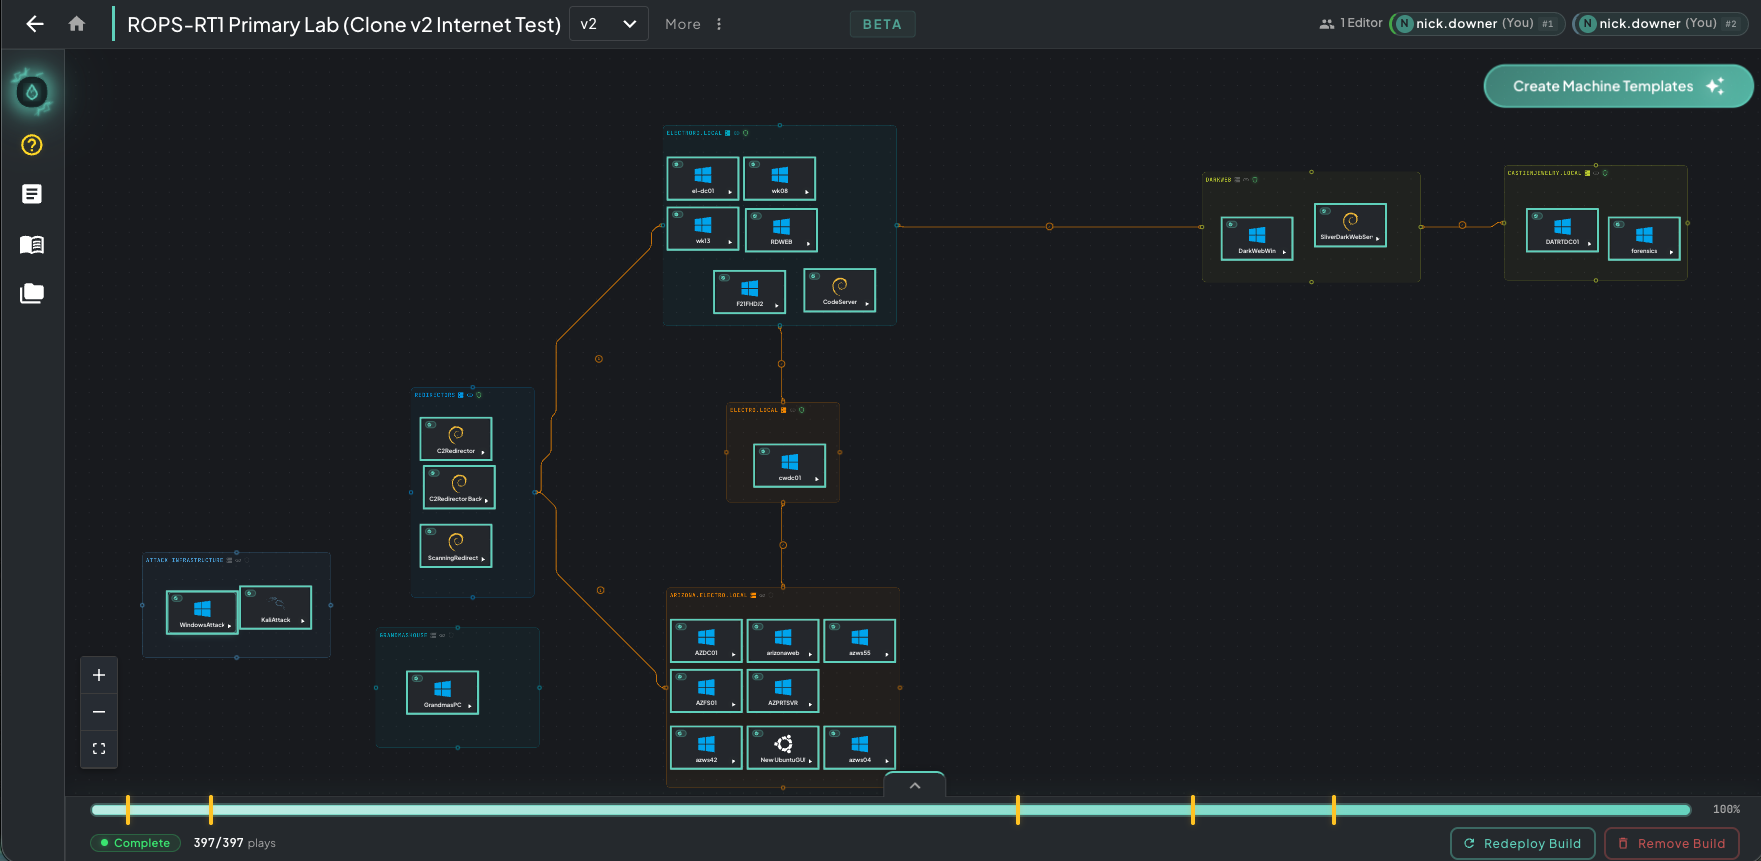 A completed build. Every machine shows Done!, the status pill reads Complete, and the Create Machine Templates button in the top right means you can move on.
Revert to a Build Snapshot
Section titled “Revert to a Build Snapshot”The build takes snapshots as it runs. Each one shows as a gold marker on the build timeline in the status bar; hover a marker to see when it was taken. You can roll the deployed VMs back to any of them, for example to repeat a manual test from a known state.
- Wait until the build finishes or halts. Until then, View/Revert to Snap is disabled.
- Click View/Revert to Snap in the status bar, next to Redeploy Build.
- In the list, click Revert next to the snapshot you want. Snapshots you created are labeled Checkpoint.
- Confirm in Revert to snapshot?.
Reverting restores the VMs to that snapshot. The build doesn’t re-run, and no build tasks are queued. Redeploy Build and Remove Build are disabled until the revert finishes. To revert and then run your fixed plugins, use Redeploy Build with Resume from checkpoint instead.
Canvas Time Machine
Section titled “Canvas Time Machine”Rogue Architect backs up your canvas design every night. It also saves a backup before Oracle applies a plan and before a restore. Click History next to the save status at the bottom right of the canvas to open the Canvas Time Machine.
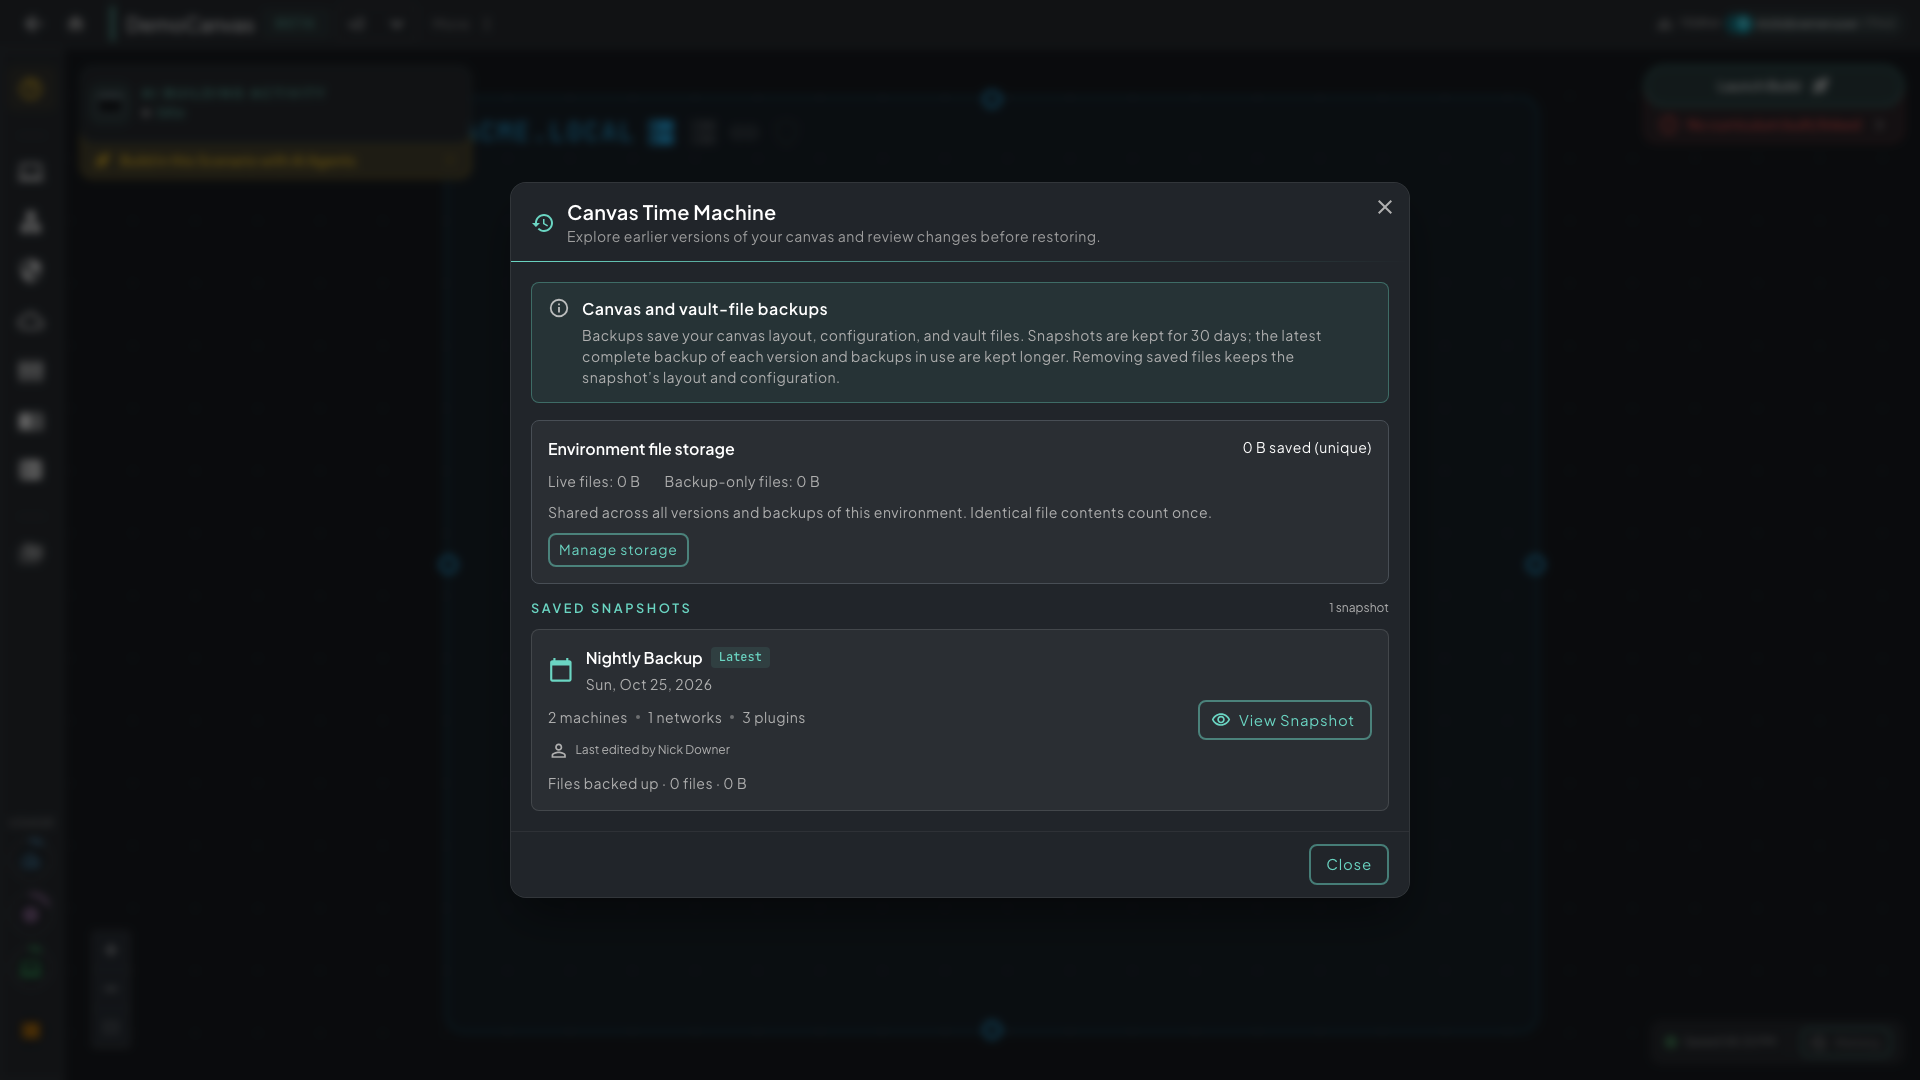 The Canvas Time Machine. The newest snapshot is marked Latest.
Each snapshot is labeled Nightly Backup, Before Apply, or Before Restore, with its date, machine and network counts, and who last edited the canvas. Snapshots marked View only can’t be restored, and the card says why.
To restore a snapshot:
- Click View Snapshot on its card to open a read-only view of that canvas.
- Click Review restore. Rogue Architect compares the snapshot with the live canvas and lists what each restore would change, remove, or leave unchanged.
- Read the list and tick each acknowledgement checkbox. They confirm that the restore overwrites the live canvas and removes items that exist only in the current version, and explain what happens to uploaded files.
- Click Restore canvas.
A Before Restore backup of the current canvas is saved first, so you can undo a restore the same way. Editing stays locked until the restore and its vault-file work finish.
If a snapshot’s saved files were pruned with Remove Backups on the Storage page, the button reads Review definition-only restore. That brings back the layout and settings without the files.