

Lab Creation
A blueprint is the full design of a scenario: its VLANs, machines, plugins, Active Directory forests, and exploit paths. You build a blueprint once, save it, and deploy it whenever you need it. This section walks through the whole process, from an empty canvas to a published lab that others can deploy.
You can lay out the blueprint yourself on the drag-and-drop canvas, or describe the lab to your AI agent and let it do the work. The agent designs the network, places the machines, attaches plugins, and writes new plugins when nothing in the catalog fits.
Where to Start
Section titled “Where to Start”Open Rogue Architect → Blueprints. This is your scenario library, and it gives you two ways to start.
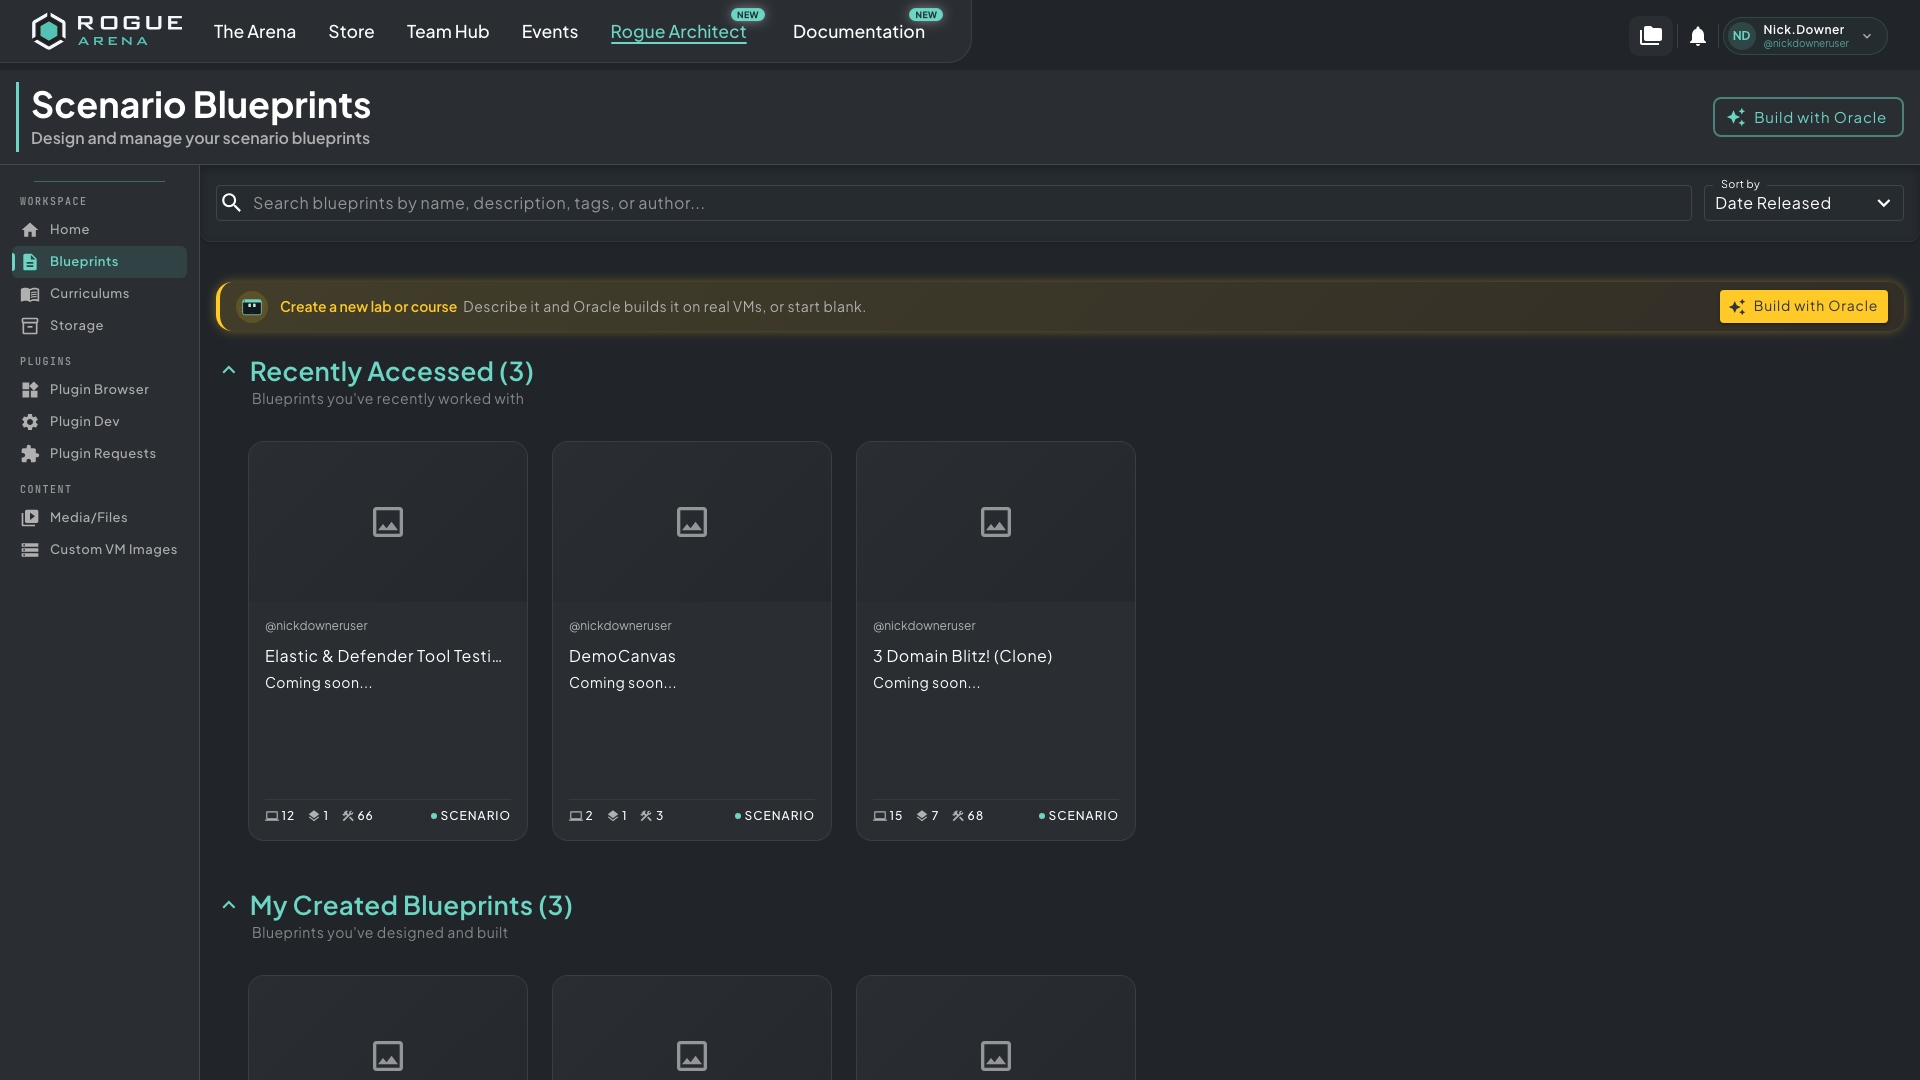 The Blueprints page. The create button is in the top-right, and your existing blueprints are listed below.
Start from scratch. Click Build with Oracle in the top-right, or in the Create a new lab or course banner above your blueprints. Rogue Architect creates a canvas and opens Oracle’s start prompt, where you describe the lab for Oracle to build (Building with Oracle covers the rest). To lay it out yourself instead, click Go manual mode (Freeform). If Oracle isn’t offered on your account, the button reads New Blueprint and opens a blank canvas.
A new canvas starts as an untitled scenario. Set its name and type later in More → Edit Scenario Info. If you haven’t picked a lab type yet, read Lab Types first. The type decides what learners can see and when tasks unlock.
Copy an existing scenario. Open a blueprint from Recently Accessed, My Created Blueprints, or any other scenario you can access. If you only have view and clone rights, a yellow Clone to My Library button appears in the top-right. Otherwise, use More → Clone in the canvas header. Either way you get your own copy to change, and the original stays as it was. Permissions and Cloning covers cloning in detail.
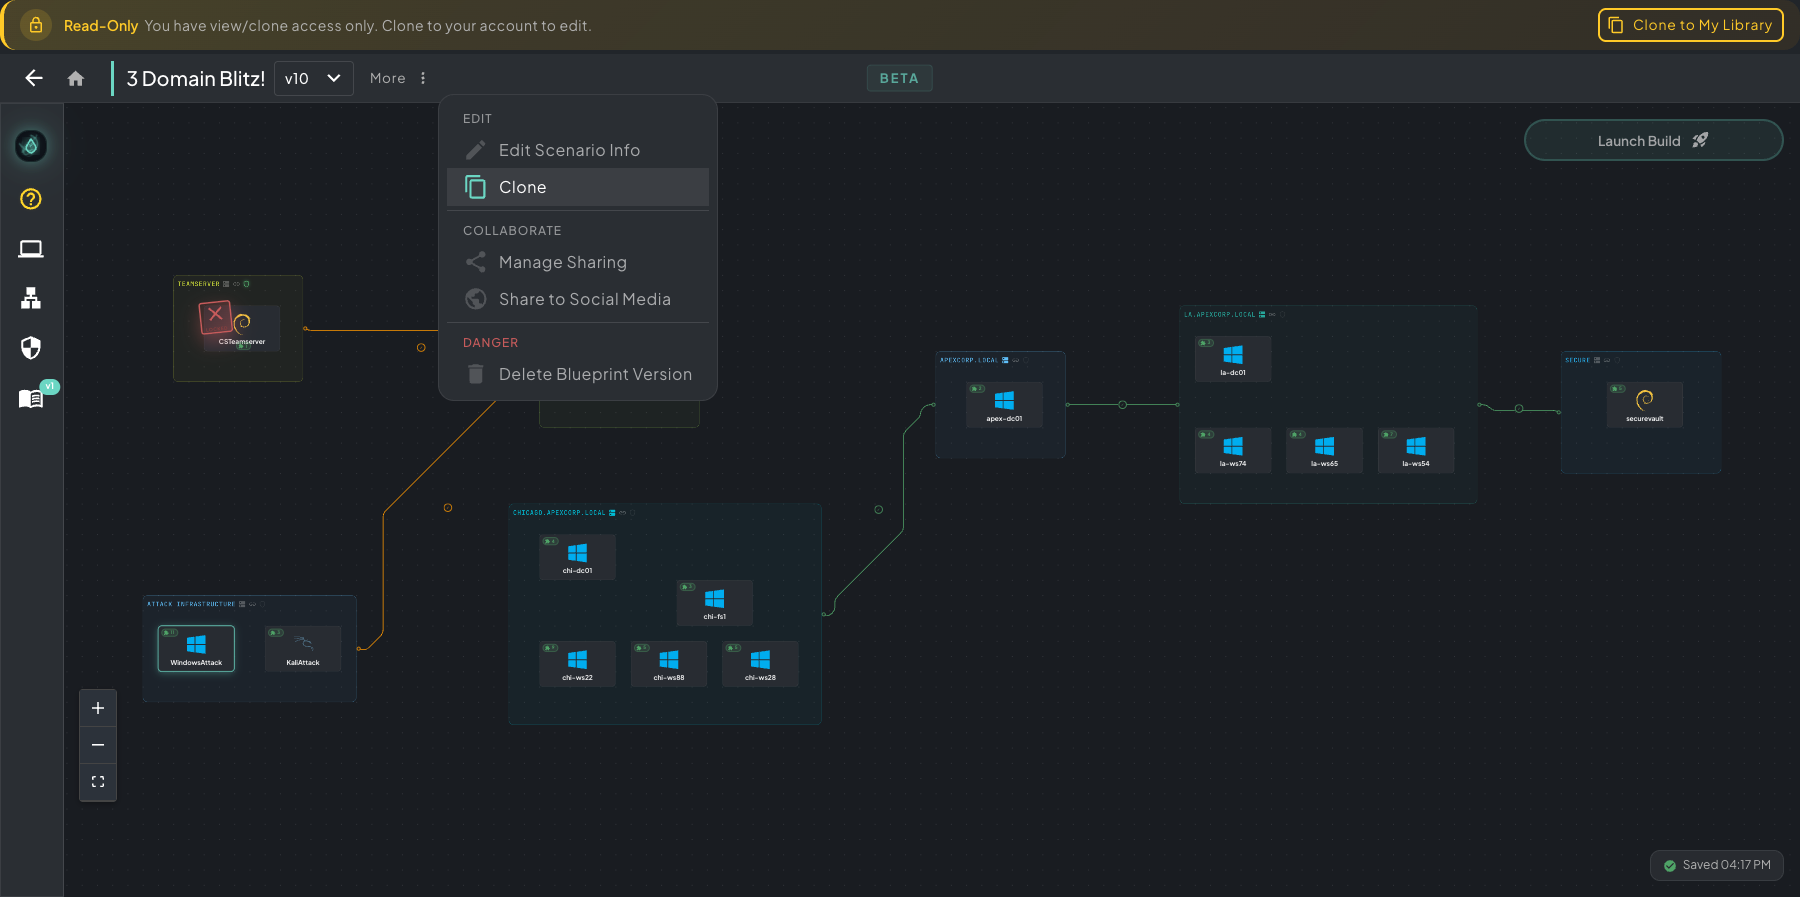 Two ways to clone: the yellow Clone to My Library button (view and clone access), or More → Clone in the canvas header.
Lifecycle
Section titled “Lifecycle”Every blueprint goes through five phases. Click a phase to read about it.
Design Canvas
Lay out VLANs, drop machines, add plugins, connect networks.
02Build & Test
Launch a real infrastructure build and monitor progress.
03Templatize
Save your build as a reusable scenario template.
04Curriculum
Create and link teaching content to your scenario.
05Publish
Set permissions and make your scenario visible to users.