

Adding Machines
Machines are the virtual machines in your scenario. Each one is based on a template: a pre-built OS image (Windows Server, Ubuntu, Kali Linux, and others) that your build starts from.
Adding a Machine
Section titled “Adding a Machine”- Open the Machines section in the left sidebar to see the available templates.
- Find the template you want, such as “Windows Server 2022”, “Ubuntu 22.04”, or “Kali Linux”.
- Drag the template onto a VLAN container on the canvas.
- In the configuration panel that opens, set a nickname and adjust any other settings.
- Click Save.
The machine appears as a node inside the VLAN container.
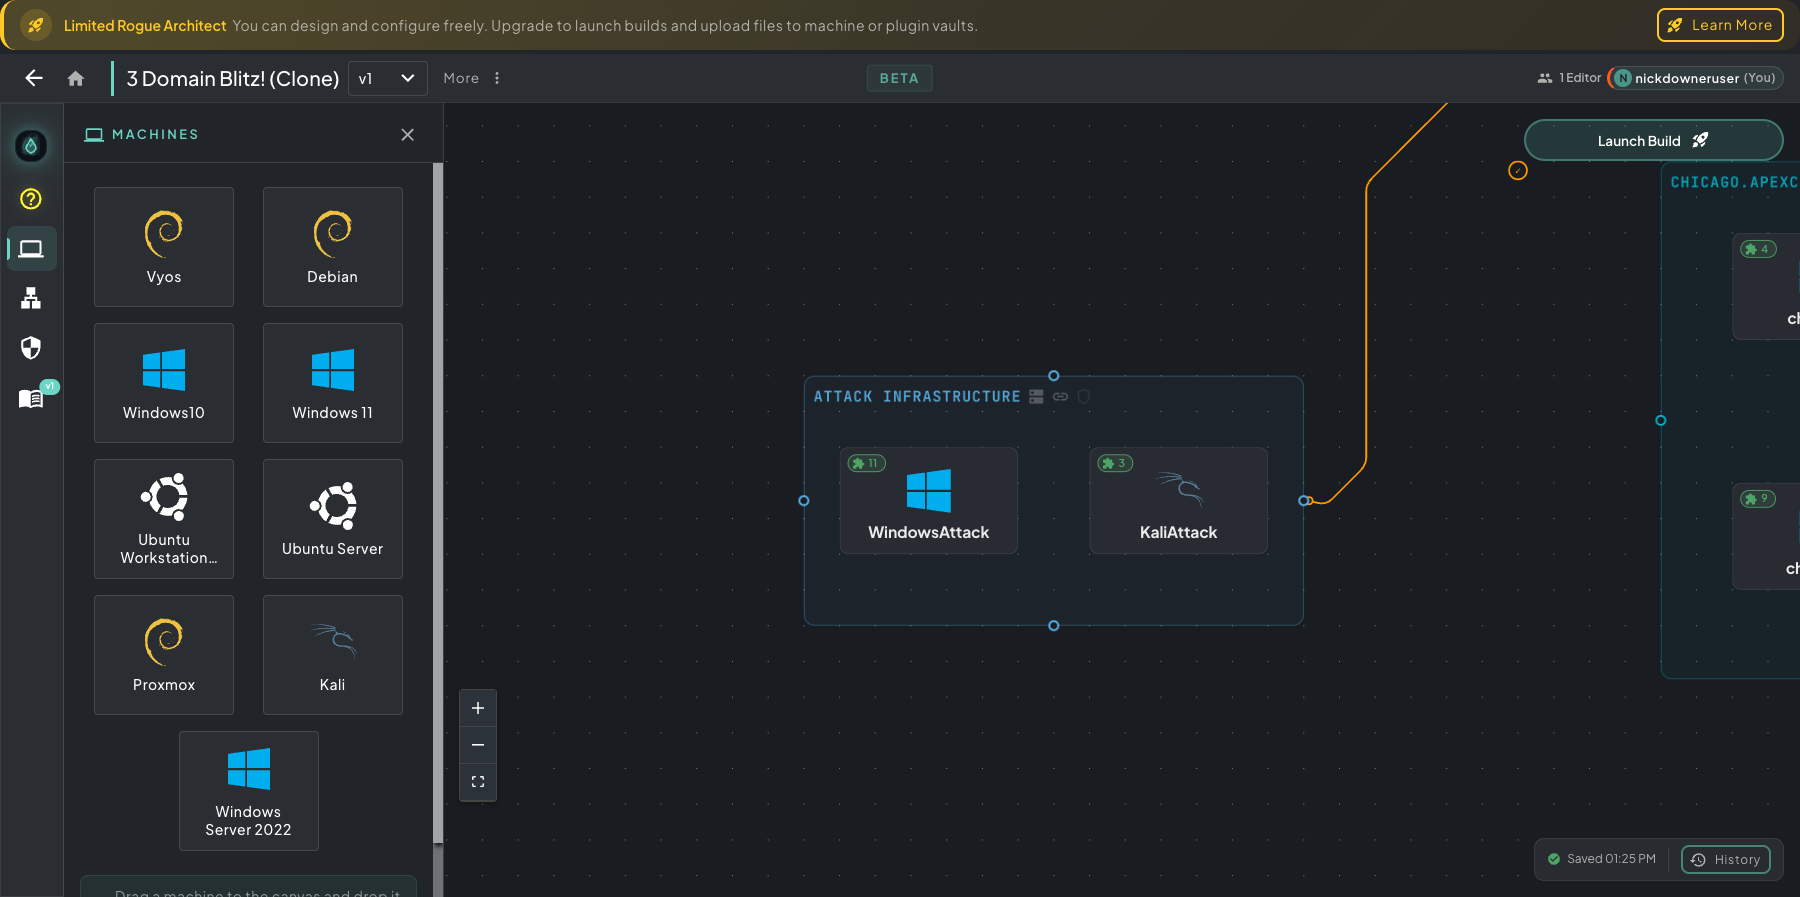 Drag any template from the Machines panel on the left onto a VLAN container. The VLAN on the right shows the result: a domain segment with a DC, a file server, and workstations.
Machine Settings
Section titled “Machine Settings”Basic Settings
Section titled “Basic Settings”- Nickname: a descriptive name for the machine, such as “DC01”, “Kali-Attack”, or “WebServer”.
- RAM (GB): the memory allocated to the VM.
- CPU Cores: the number of CPU cores.
Visibility Settings
Section titled “Visibility Settings”- User Controllable: when this is on, students can view and control the VM before they complete the scenario. Once the scenario is complete, every machine becomes visible no matter how this is set. Turn it off for backend infrastructure machines that students shouldn’t use directly.
- Include in Student VM Dock: students see 2 VM slots as soon as they log in. Turn this on for the main machines students will work from, usually a Windows workstation and a Kali attack machine.
Advanced Options
Section titled “Advanced Options”- Architect Given Username / Password: credentials shown to students for this machine. They are for display only and are not created on the VM automatically. To create the user account, you need a plugin.
- Enable Internet During Architect Build: gives the machine internet access during the Ansible build phase, which helps with patching, installing updates, and downloading packages. Requires the Architect Internet permission.
- Enable Internet in End-User Deployment: gives the machine internet access when end users deploy and launch the scenario. Requires the Deployed Internet permission.
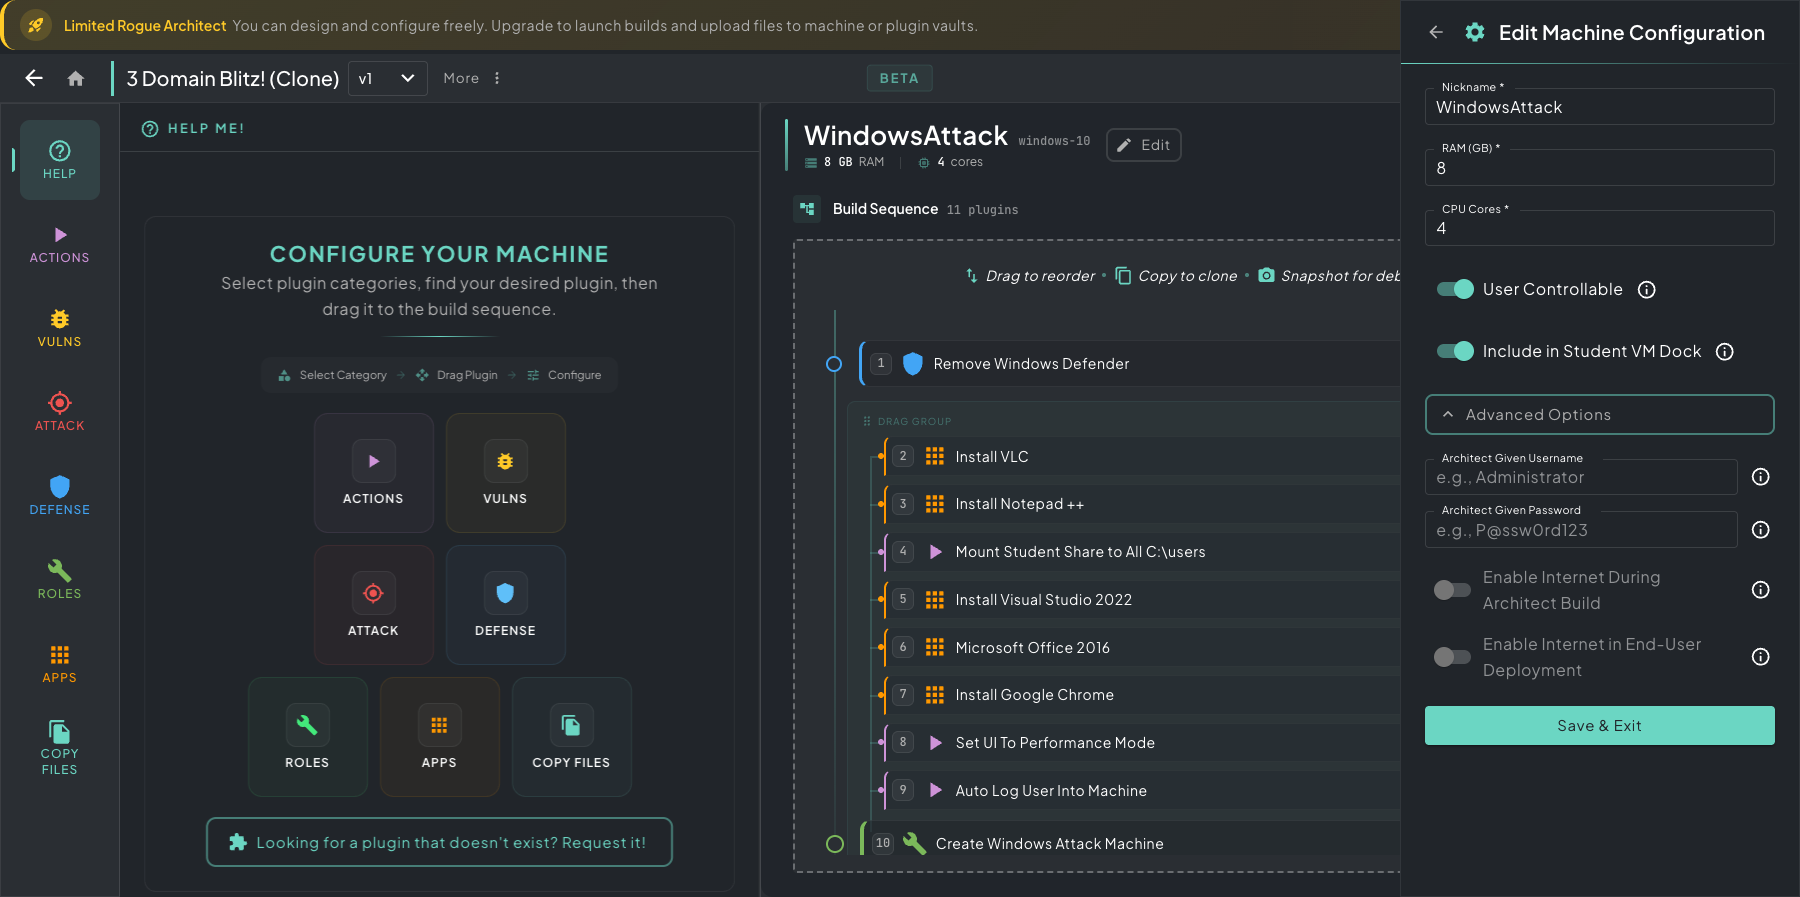 The machine view. Help Me’s plugin categories are on the left and the build sequence is in the middle. On the right, Edit Machine Configuration has Advanced Options open, including the architect-given credentials and the internet toggles.
Moving Machines Between VLANs
Section titled “Moving Machines Between VLANs”To move a machine to another VLAN, drag it on the canvas into the new VLAN. The machine leaves its current VLAN and joins the new one.
Cloning Machines
Section titled “Cloning Machines”To clone a machine, select it and click Copy in the dock above it (or press Ctrl+C, Cmd+C on a Mac). Each VLAN then shows a Paste overlay with the machine’s name. Click anywhere in the target VLAN to paste the clone there. Press Esc to end paste mode. The clone gets copies of all the machine’s plugins and their configured parameters, which saves time when you need several similar machines.