

Configuring Plugin Parameters
Each plugin has parameters that control what it does during the build. Some are required, and the build won’t work without them. The rest are optional and have sensible defaults.
Opening Plugin Configuration
Section titled “Opening Plugin Configuration”- Double-click a machine to enter machine edit mode.
- Click a plugin in the build sequence.
- The parameter configuration panel opens.
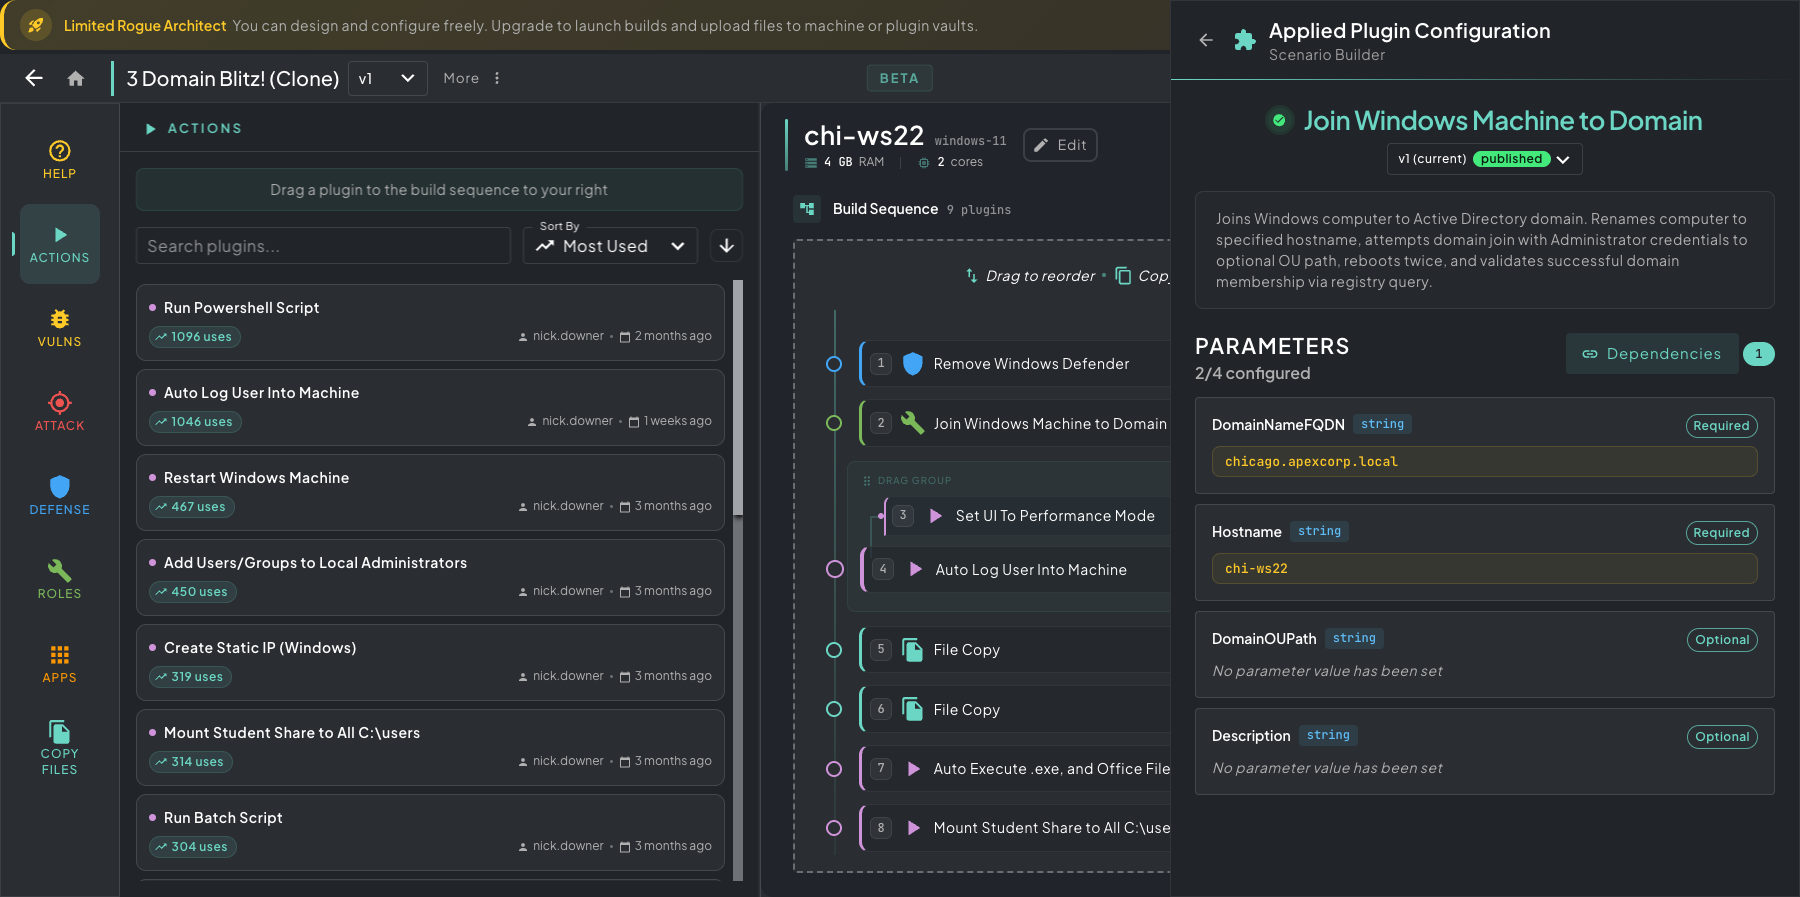 The plugin parameter panel. Open a plugin in the build sequence to see every required and optional input it accepts.
Parameter Types
Section titled “Parameter Types”Each parameter has a type, and each type has its own editor:
| Type | Editor | Use Case |
|---|---|---|
| String | Text input | Simple values like usernames, IP addresses, domain names |
| Number | Numeric input | Ports, counts, timeouts |
| Boolean | Toggle switch | Enable/disable features |
| String Block | Code editor | Scripts, config files, multi-line content |
| CSV | Code editor with CSV checks | Tabular data like user lists, IP tables |
| File | File list with uploads | Wordlists, installers, configs, sample data |
String Block Editor
Section titled “String Block Editor”For string block parameters, you get a full code editor (Monaco, the same engine VS Code uses) with syntax highlighting. Use the language selector to switch between:
- PowerShell, Bash/Shell, Batch
- Python, JavaScript, TypeScript
- YAML, JSON, XML, SQL
- Dockerfile, Plain Text
CSV Editor
Section titled “CSV Editor”For CSV parameters, you get a Monaco-based editor that lints and validates as you type. It flags parse errors, missing required headers, and rows with the wrong number of columns, so you catch problems before the build runs.
File Editor
Section titled “File Editor”For File parameters, you upload the files the plugin needs. The editor shows which extensions the plugin accepts (or Any file type) and lists each uploaded file with its size and upload time.
- Drop files on the editor or click it to pick them. Each file can be up to 4 GiB.
- A file with the same name as one already uploaded asks before replacing it.
- Click the trash icon to delete a file. The next build or redeploy won’t copy it.
Uploads and deletes take effect right away; there’s no separate Save. At build time, all of the parameter’s files are copied into one folder on the machine. If the parameter is required and has no files yet, it shows a warning.
Required vs Optional
Section titled “Required vs Optional”Each parameter is marked required or optional:
- Required parameters need a value before you can build. They show a warning indicator while empty.
- Optional parameters use their default values if you don’t set them.
The plugin card in the build sequence shows a status indicator:
- Yellow: some required parameters are missing.
- Green: all parameters are configured.
Cross-Machine Dependencies
Section titled “Cross-Machine Dependencies”Some plugins depend on plugins that run on other machines. For example, a Join Windows Machine to Domain plugin on a workstation depends on a Domain Controller plugin running on a separate server.
The plugin’s Dependencies button shows how many plugins on other machines must finish first. Click it to add or remove them. A dependent plugin waits until those plugins finish, so you don’t need to order anything across machines.
Automated Actions
Section titled “Automated Actions”Some plugins come with automated actions. As soon as you add or configure one of these plugins, it makes the matching changes on the canvas for you, so the rest of the scenario stays consistent without manual wiring.
- Create ROOT / CHILD Domain Controller (DC): the domain name you set on the DC plugin is added to the parent VLAN as a DNS forwarding target, so every other machine on that segment resolves the domain through the DC.
- Join Windows Machine to Domain (and the Linux version): proposes a cross-machine dependency from the join plugin to the DC whose domain matches (selected by default in the confirmation dialog). Once you confirm it, the DC is built first. Workstations run their join step only after the DC is fully up.
- Install Elastic Server: static domain names for the Elastic stack are added to the network’s host mappings, so other machines (agents, beats, attackers) can resolve them by name without manual DNS setup.
Automated actions belong to the same system as the auto-apply automations described in Adding Plugins. Both handle the mechanical wiring on the canvas so you can focus on designing the scenario.
As a result, you rarely have to wire DNS forwarding, host mappings, or cross-machine build order by hand. You still set the order of plugins on each machine; see Plugin Sequence.
Saving Parameters
Section titled “Saving Parameters”Each parameter saves on its own when you click Save in its editor. If you close the editor with unsaved changes, you’re asked to confirm.